
BMW Suspension Data with AiM
Another way to get rear suspension travel into your data logger

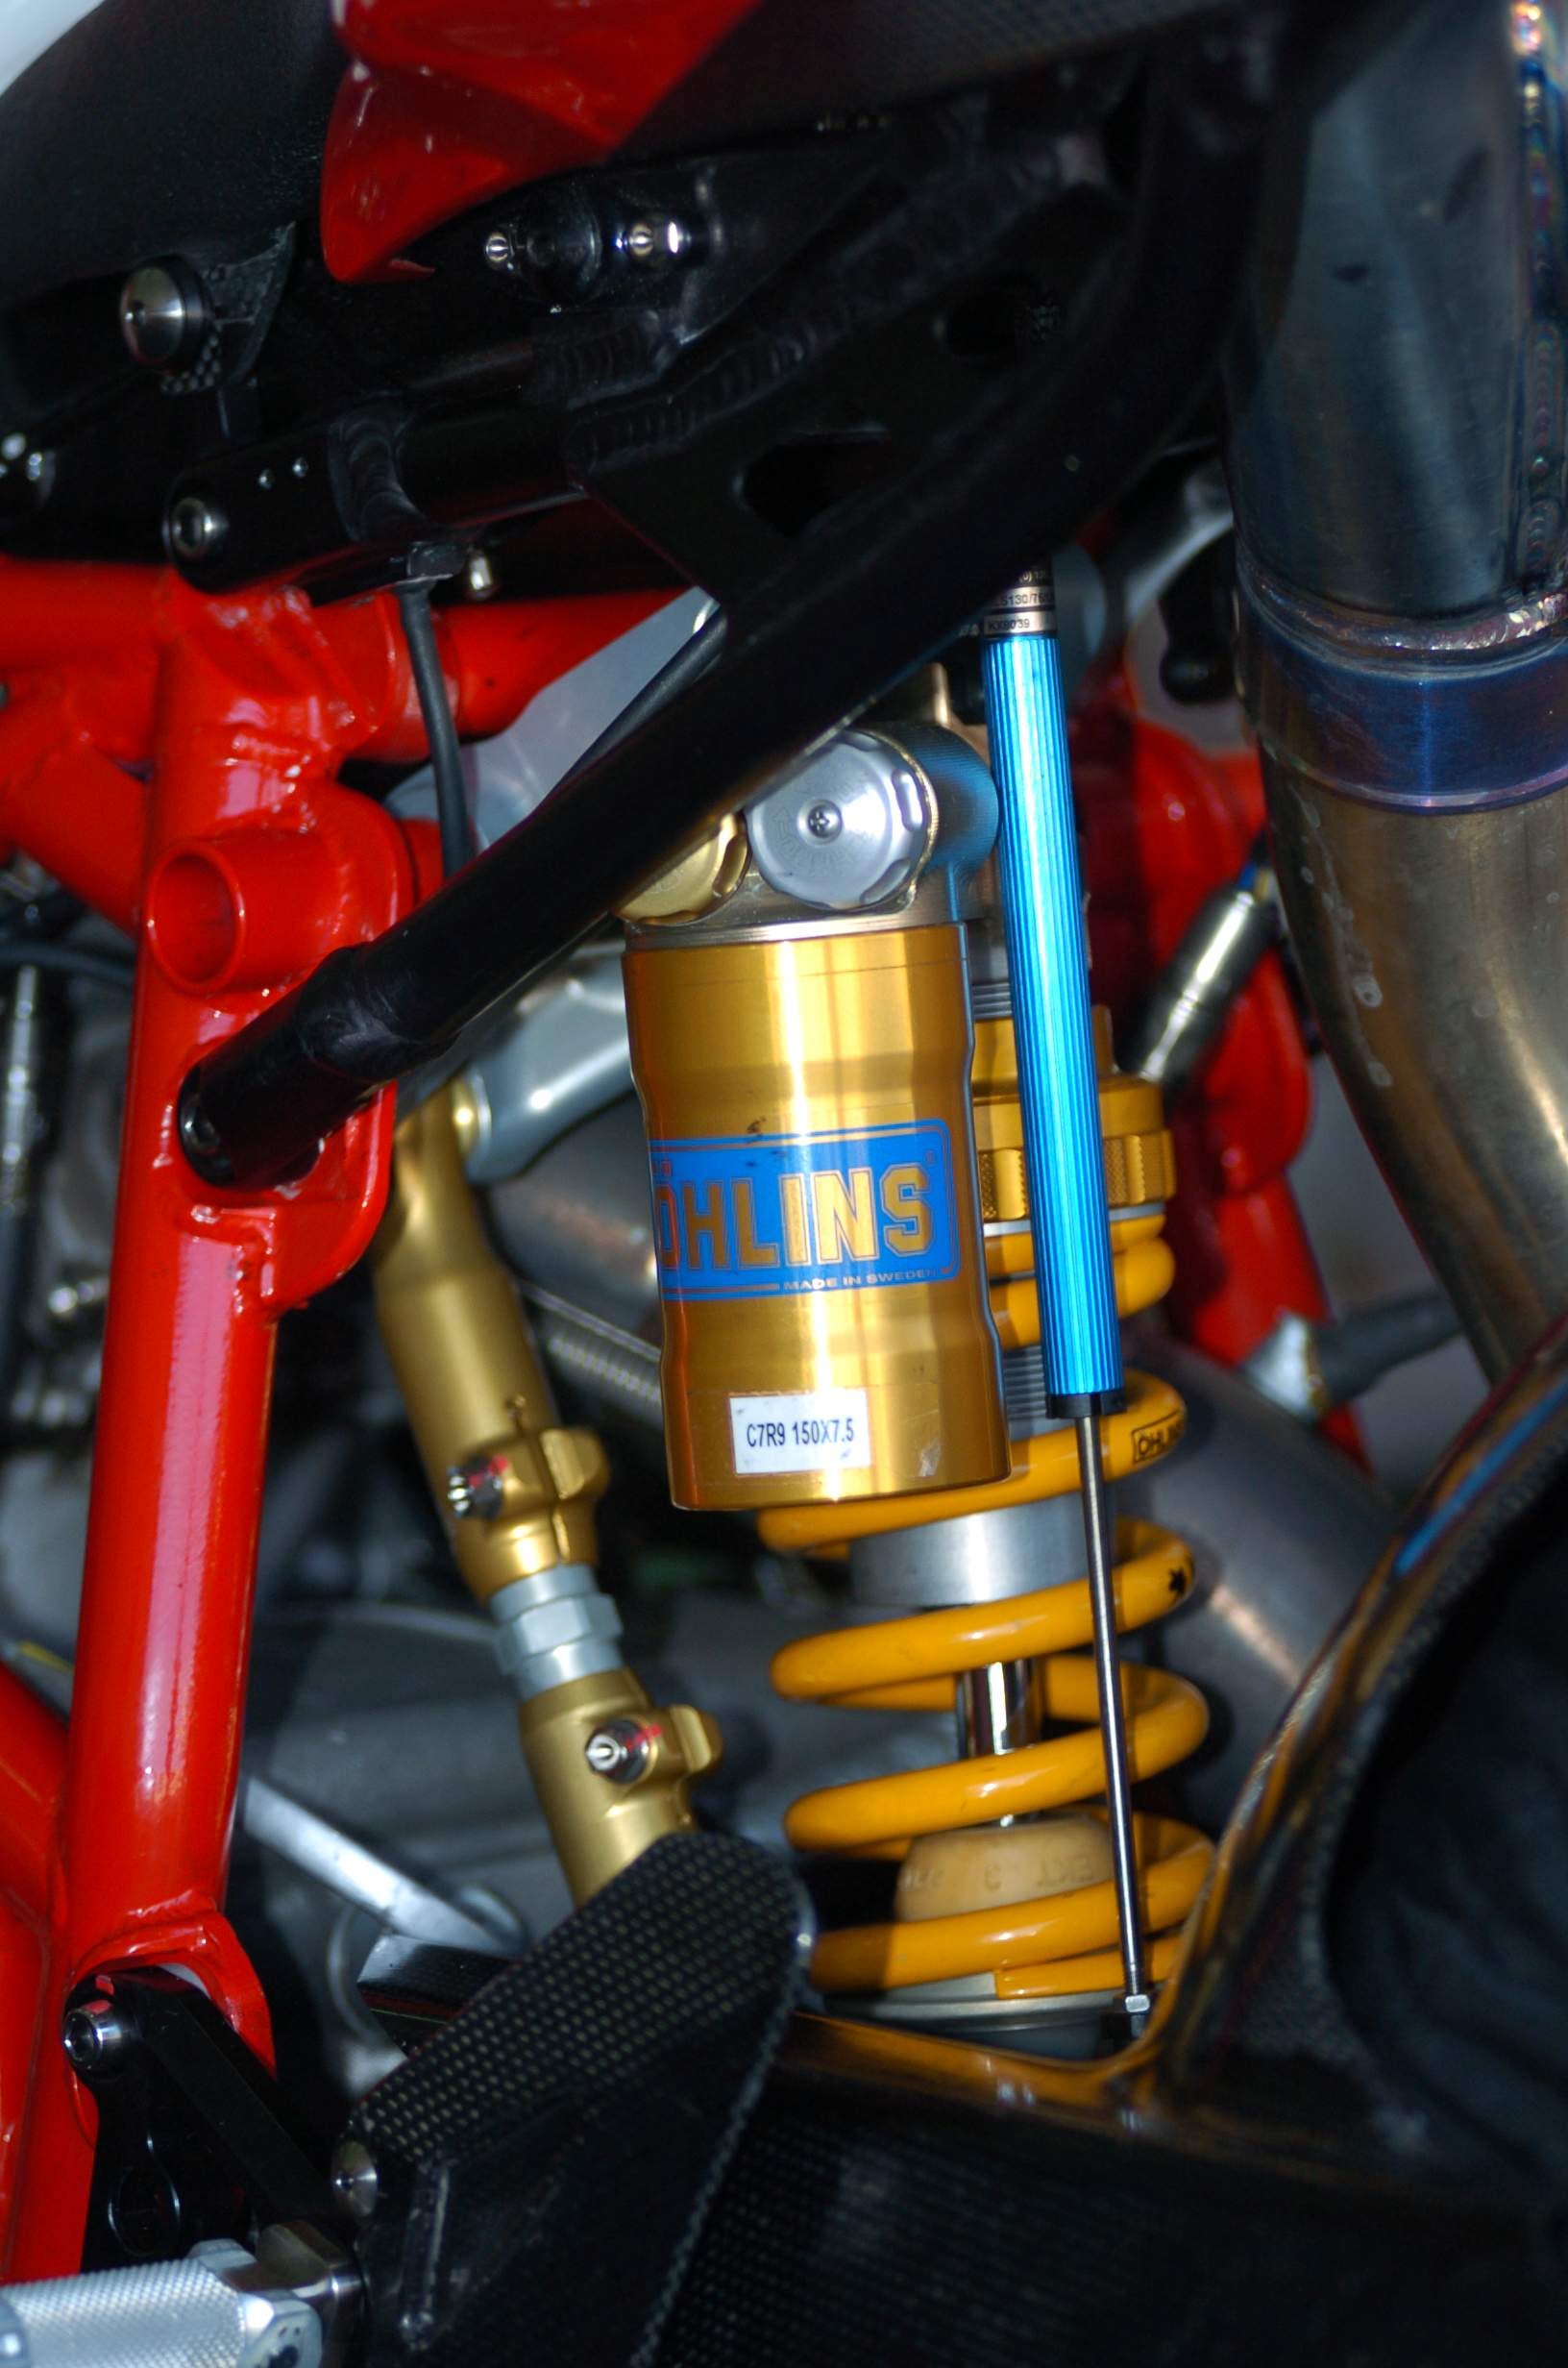
I really like having suspension data. It’s been tremendously useful to provide my coach, as well as for me looking at it to build a sense of feel for different sensations while riding. On my previous BMW (2020) and my Daytona 765, I had full Ohlins suspension and linear suspension pots front and rear.
Before delving too far into the specifics of adding the suspension measurement on the K67 BMW, there really isn’t a reason that this couldn’t be done on other bikes. It’s a matter of finding a mounting location for the sensor and the other end of the pushrod. It may take a bit of creativity but it’s a fairly simple setup and inexpensive. It’s a viable alternative when you don’t have a provision for the linear suspension potentiometer mounted in parallel to the shock.
My 2026 K67 is a base model with the manual suspension and doesn’t come with any suspension sensors. I was able to re-use the Alpha mounts for the front suspension pot but there are no elegant native provisions for attaching a suspension pot to the stock shock. Though it’s a base model, it does have the tabs/ears for attaching the BMW rear swingarm sensor so I started digging into options with that. Before going too far, I did compare the data from my old BMW because the bike came with the electronic DDC suspension, the rear swingarm sensor was in place and its data was in the AiM data. So I had that as well as the linear suspension pot and they tracked very similarly so knowing that, I decided to proceed with retrofitting the DDC rear sensor to the swingarm of my base model bike.
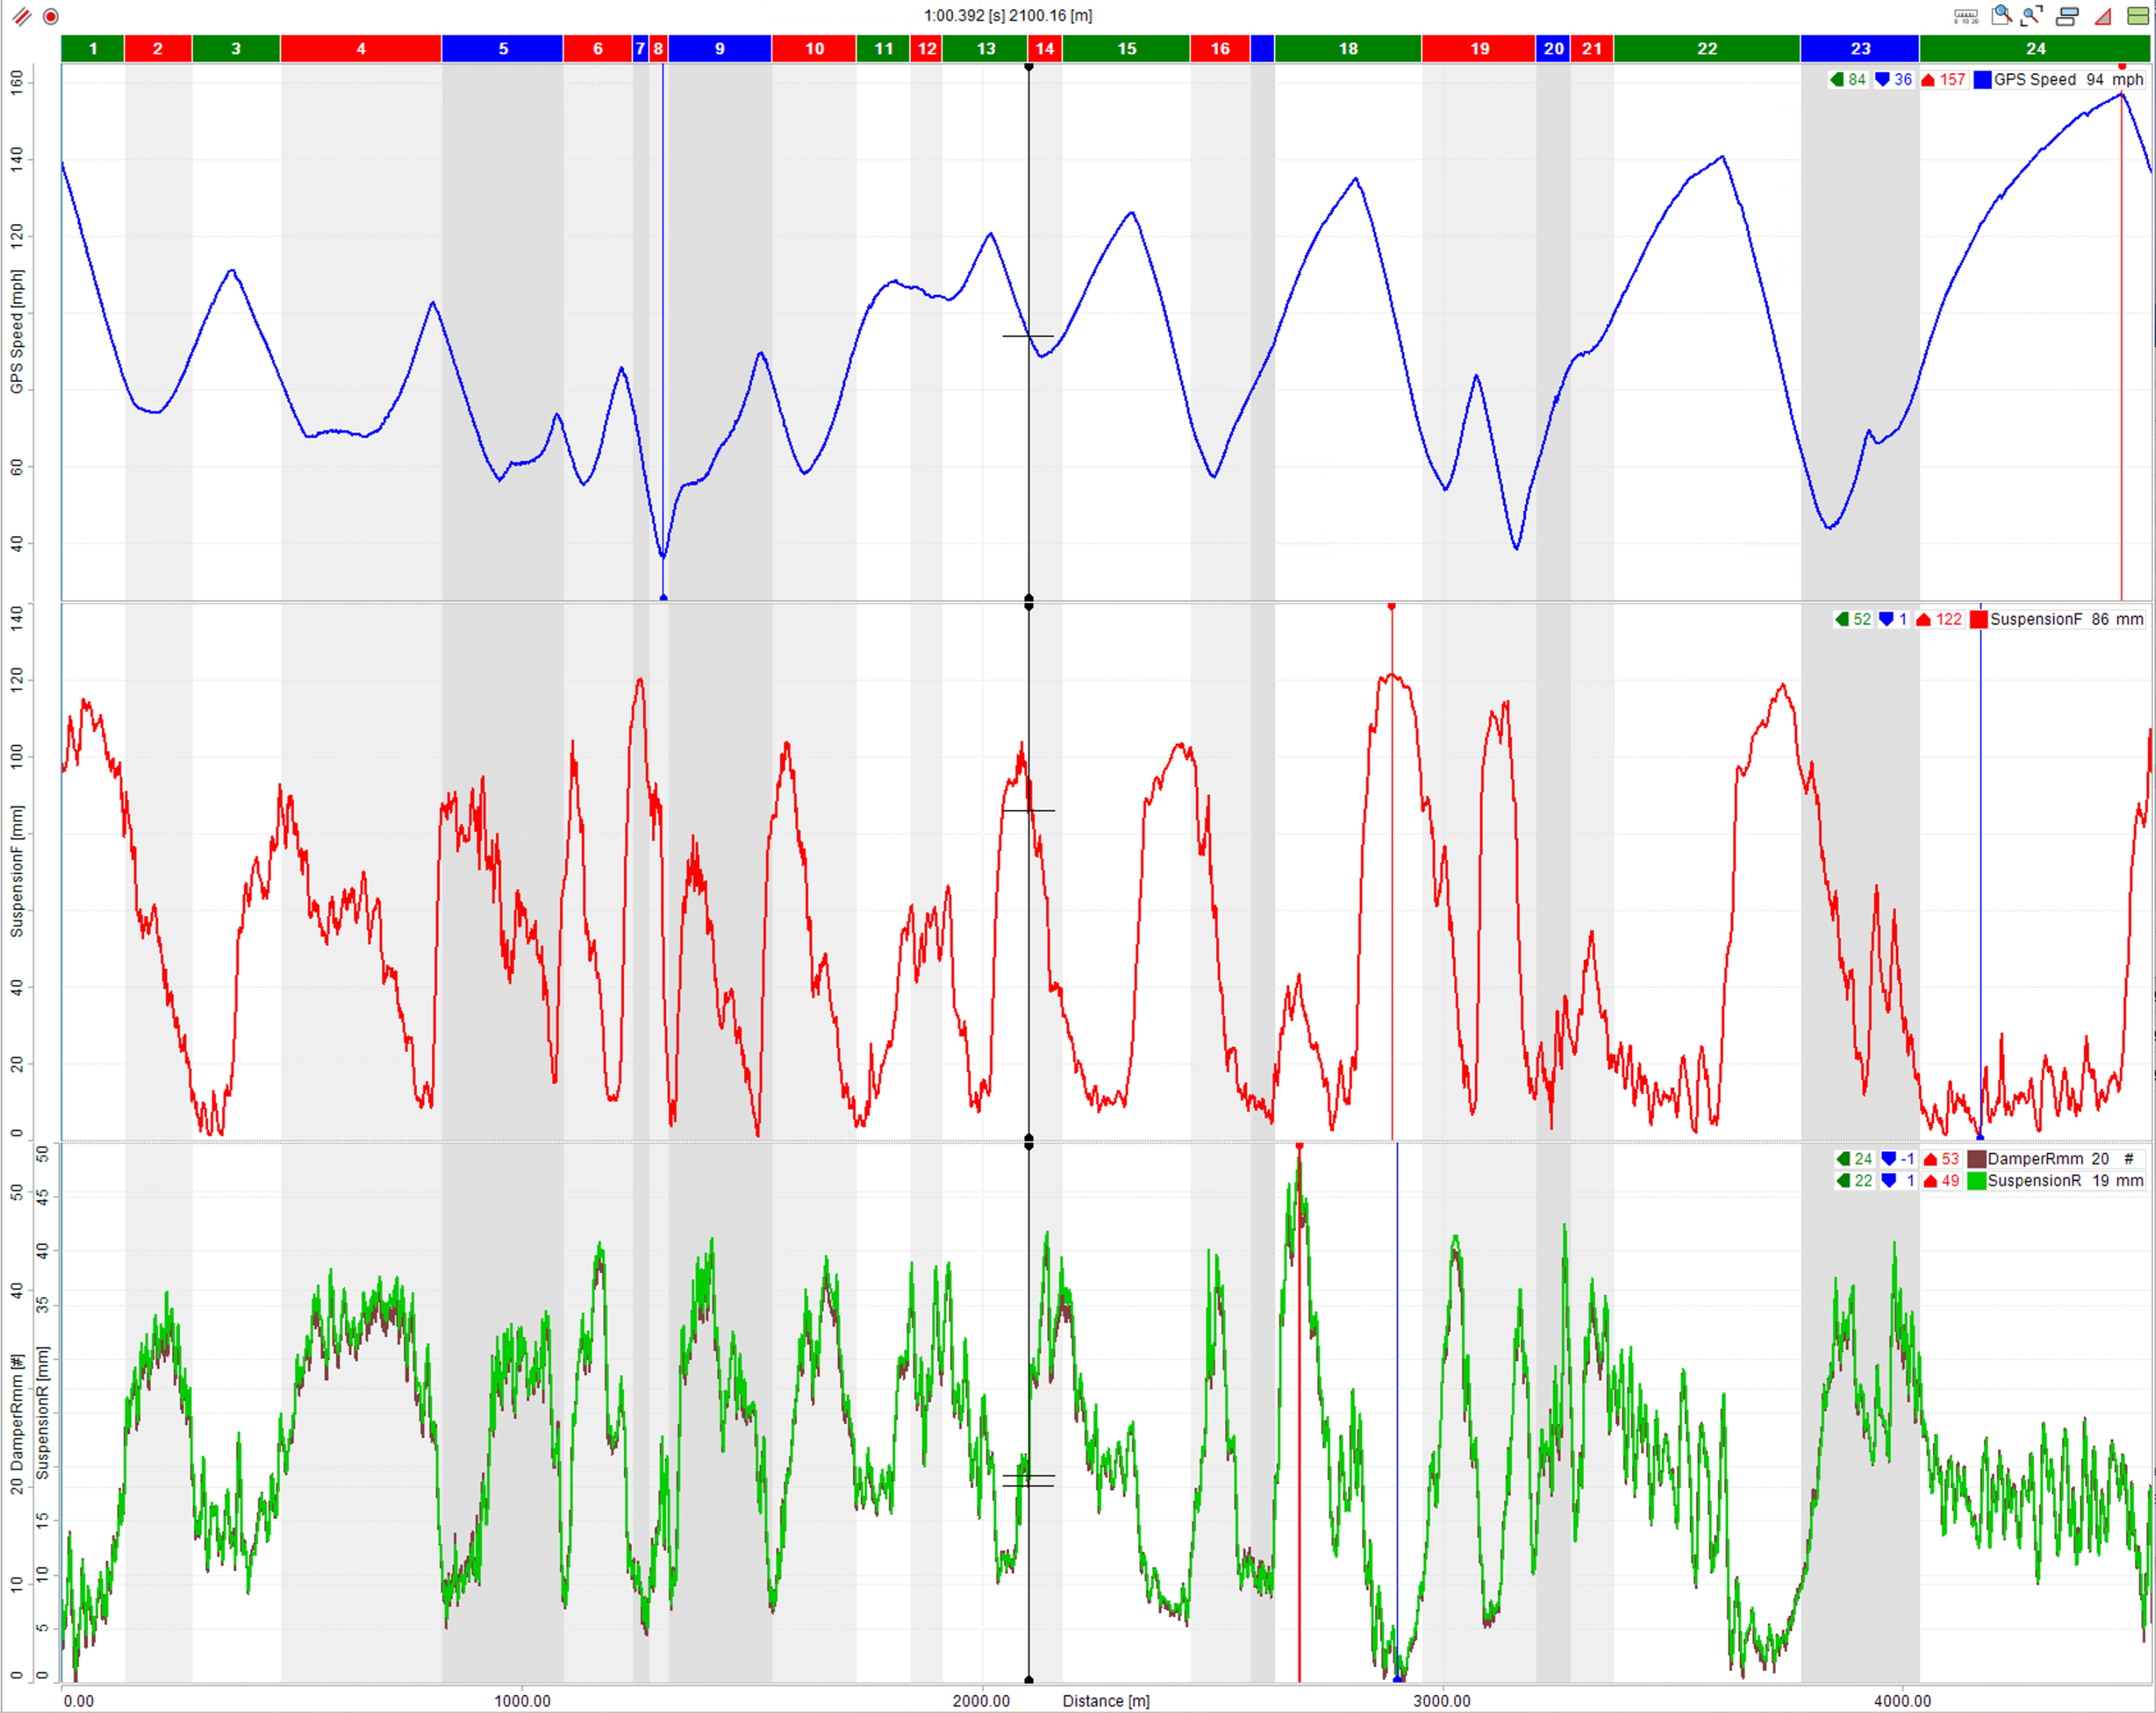
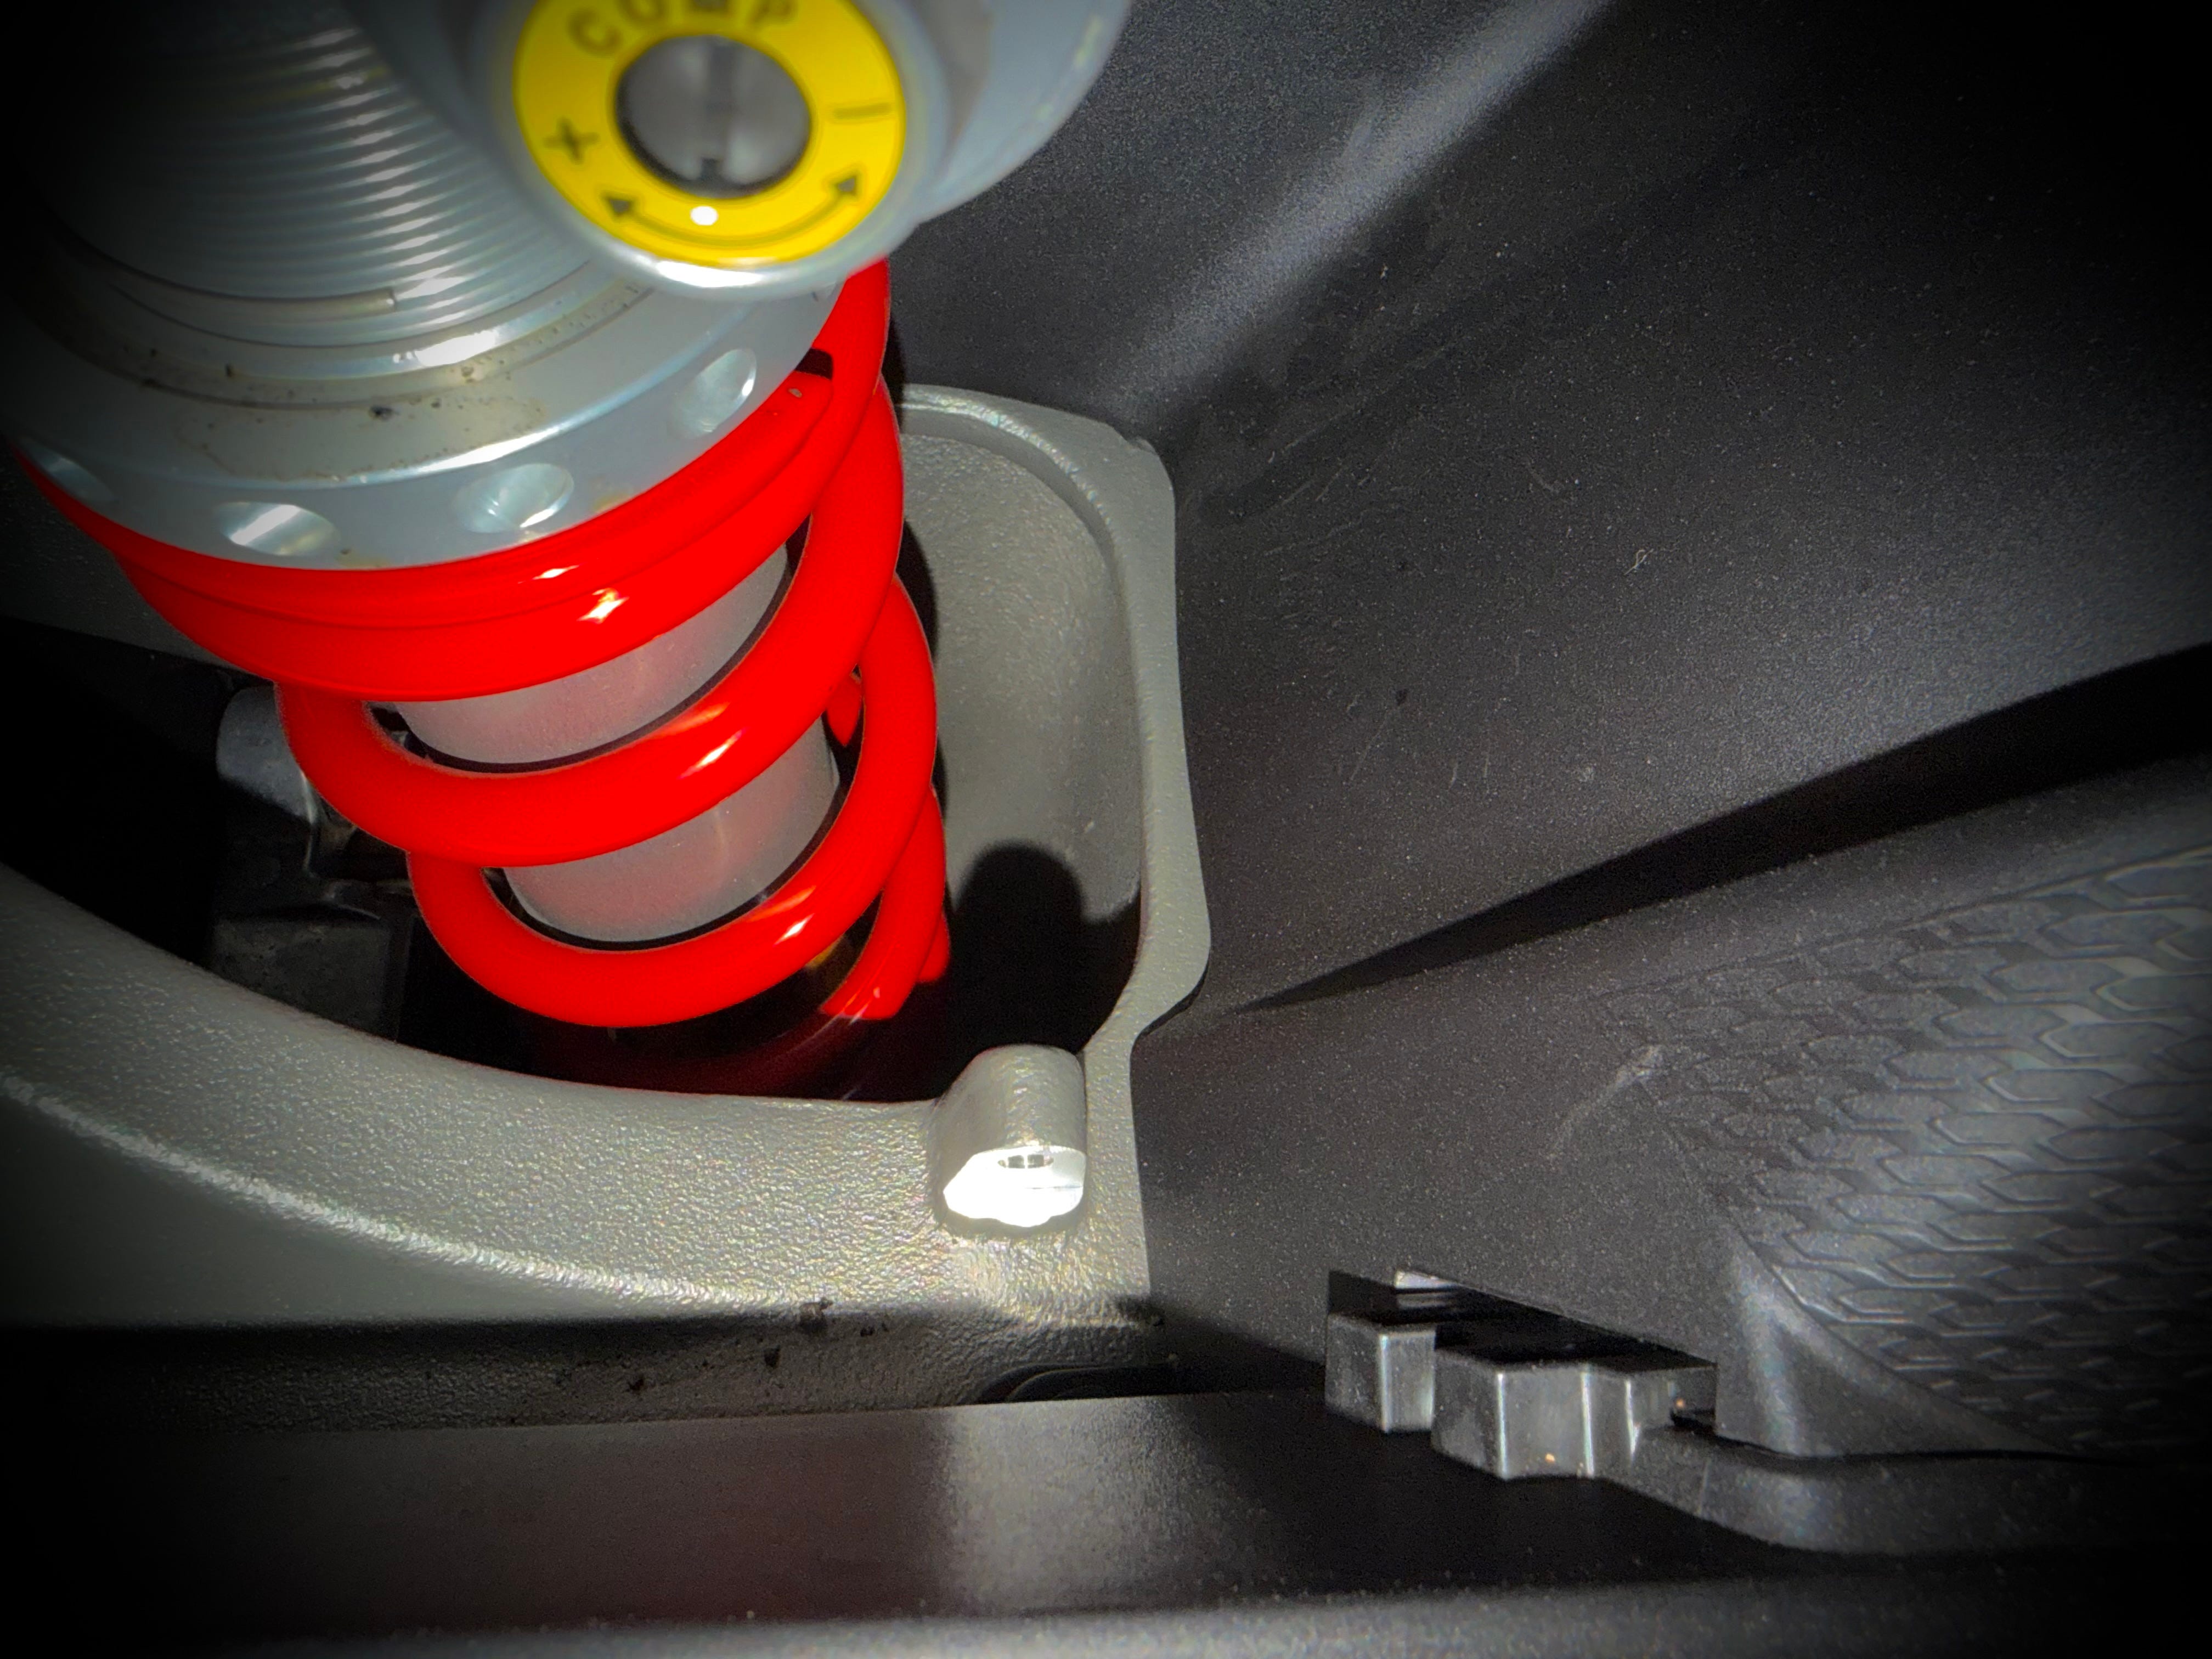
With a plan for getting rear suspension data, I started digging into the BMW OEM parts. I poked around on eBay and that’s the most economical way to get the major components, which include the sensor itself, the ball joints, and the pushrod. I sourced the original plug on eBay. All together, using used parts, it was about $60 shipped. This sensor has been in use for over 10 years on BMW cars and bikes so it’s vetted and readily available.
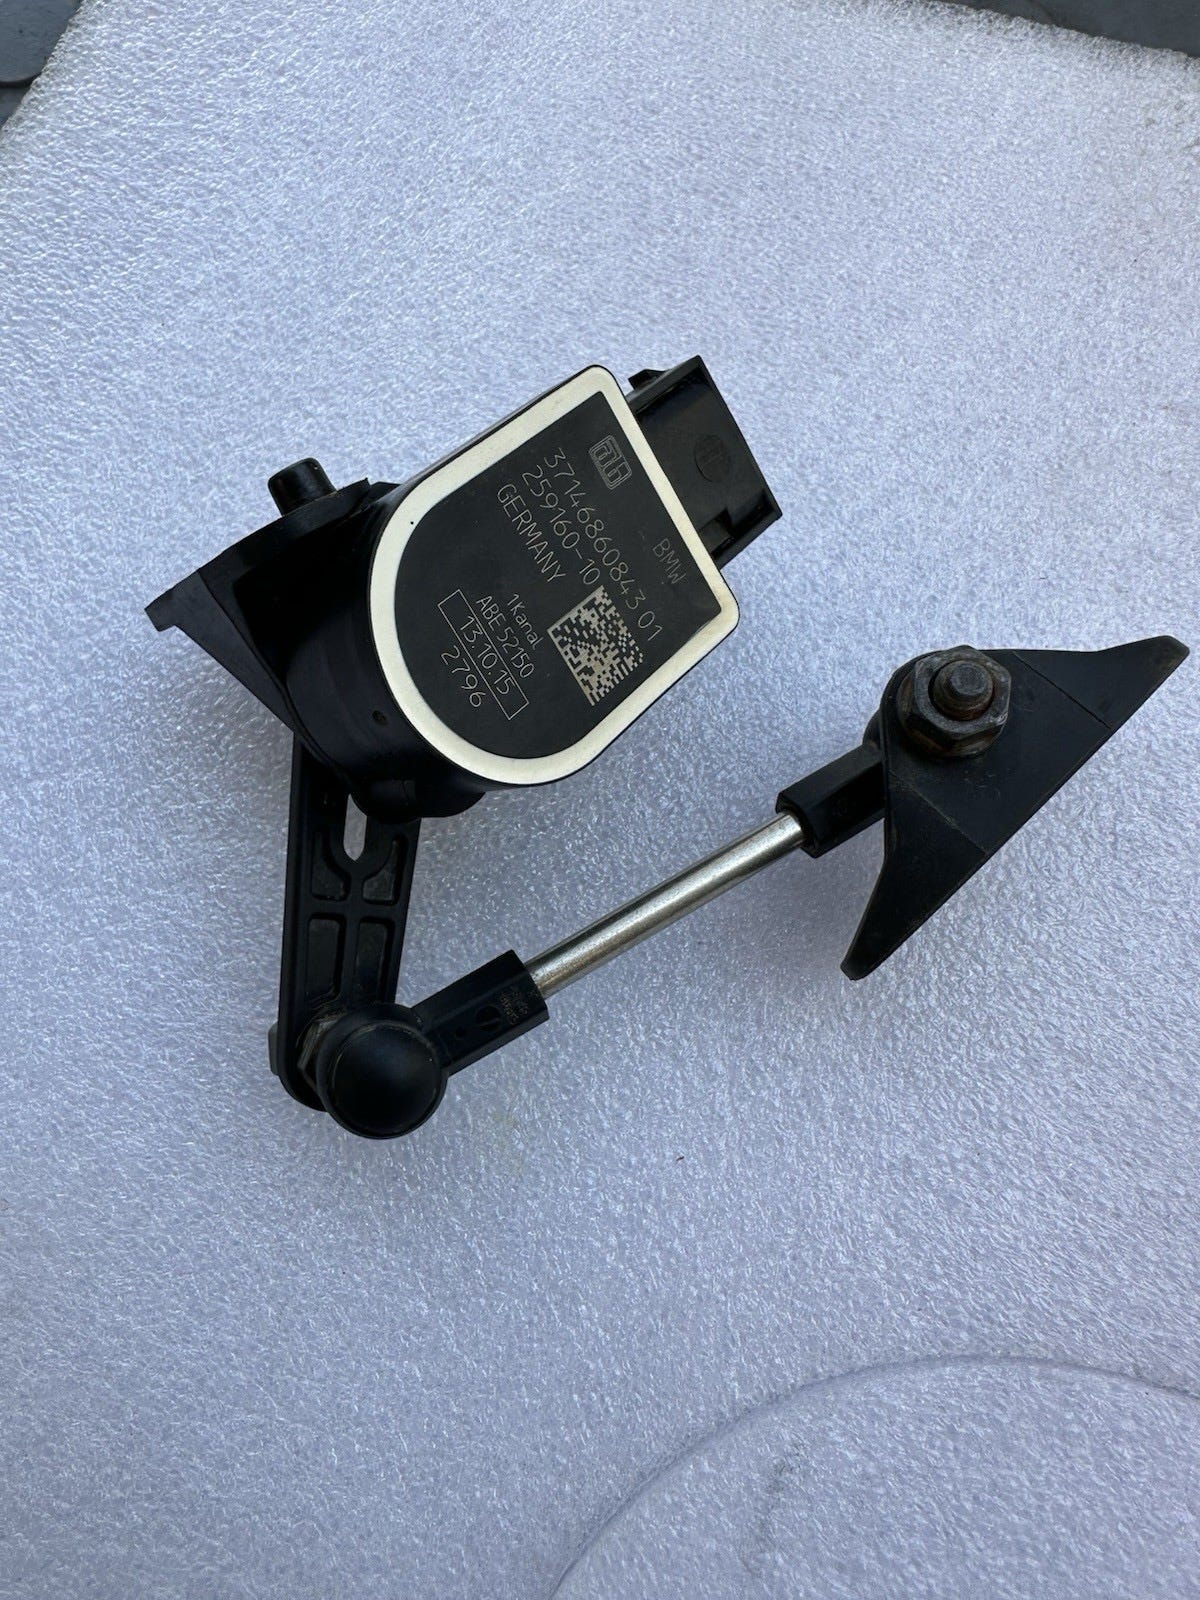
When looking on eBay for S1000RR rear sensor, I mostly got 2015-2018 hits. I then looked at the BMW parts catalog and compared the previous generation bike with DDC and the sensor part numbers are the same for the sensor but the pushrod is shorter. It also turns out that the sensor is used on other BMW bikes and nearly every car they have in the US (for suspension sensing as well as headlight auto-adjustment). Consequently, there are lots of sensors available but it appears that the linkage is specific to the S1000 (not sure if it’s only the RR but might also be the same for the XR and/or single-R).
On my bike, I already have the AiM ACC which takes in analog input and inserts it into the AiM data logger stream. The ACC has up to 4 analog channels and I’m only using one as of now (for the front AiM potentiometer) so I purchased a 719 cable and cut it to create my own custom harness. The BMW sensor, like most automotive sensors, uses 5 volts DC. It will take a little finagling and manual measurements to correlate the travel to sensor output voltage but it’s not terribly complex.
I received the parts (the plug, sensor, and a couple of pushrods and ends that connect the swingarm to the sensor arm. The sensor bolted right up to the empty tab that comes off the under tray and the ball went straight into the swingarm receiver, however the pushrods that I received were far too short. I then recalled that my BMW GS also has suspension sensors and as it turns out, the rear was an appropriate length that works with the newly installed sensor on the RR.
Parts list for my S1000RR
Sensor - 37146895466 - I bought used because I wanted one that came with the harness so I wouldn’t need to fashion a plug and mine came with the ball head bolt for attaching to the swingarm.
Pushrod - I ended up borrowing the one from my 2019 BMW R1250 GS since it provided the appropriate travel without interference. I ordered a replacement for the donor. That part number was 31488520508
If you order a new sensor or buy a used one without a plug, you’ll need to track that down. It will likely be listed as a ‘repair plug/harness’ in the BMW parts catalog or you can probably find the plug with leads that have been cut on eBay.
Bolts for mounting the sensor to the under tray. The one I purchased included the bolts but it’s easy enough to use generic bolts or look them up on the BMW parts site.
Ball head bolt for the swingarm - I suggest buying a used sensor that has all the parts. It appears that the ball head bolt is fairly universal amongst bikes and cars from BMW that use this sensor so it’s not too hard to locate. It’s probably not too expensive to buy new from BMW.
719 plastic barrel connector - I ordered a full 719 extension cable and simply cut it and stripped back the insulation and soldered it to the BMW harness. I waited to put heat-shrink tubing on until I finished measuring voltage to travel (see below). This plugged into the AiM ACC.
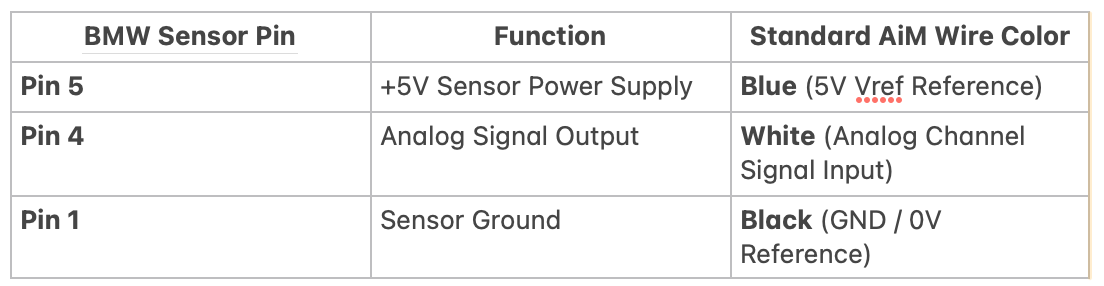
As far as the wiring connections and mapping between the AiM 719 harness and the BMW harness, here’s what’s what. It’s only 3 conductors and the BMW plug is clearly marked near each terminal. The plug can accommodate up to 8 wires but you only need 3.
Mapping travel to voltage
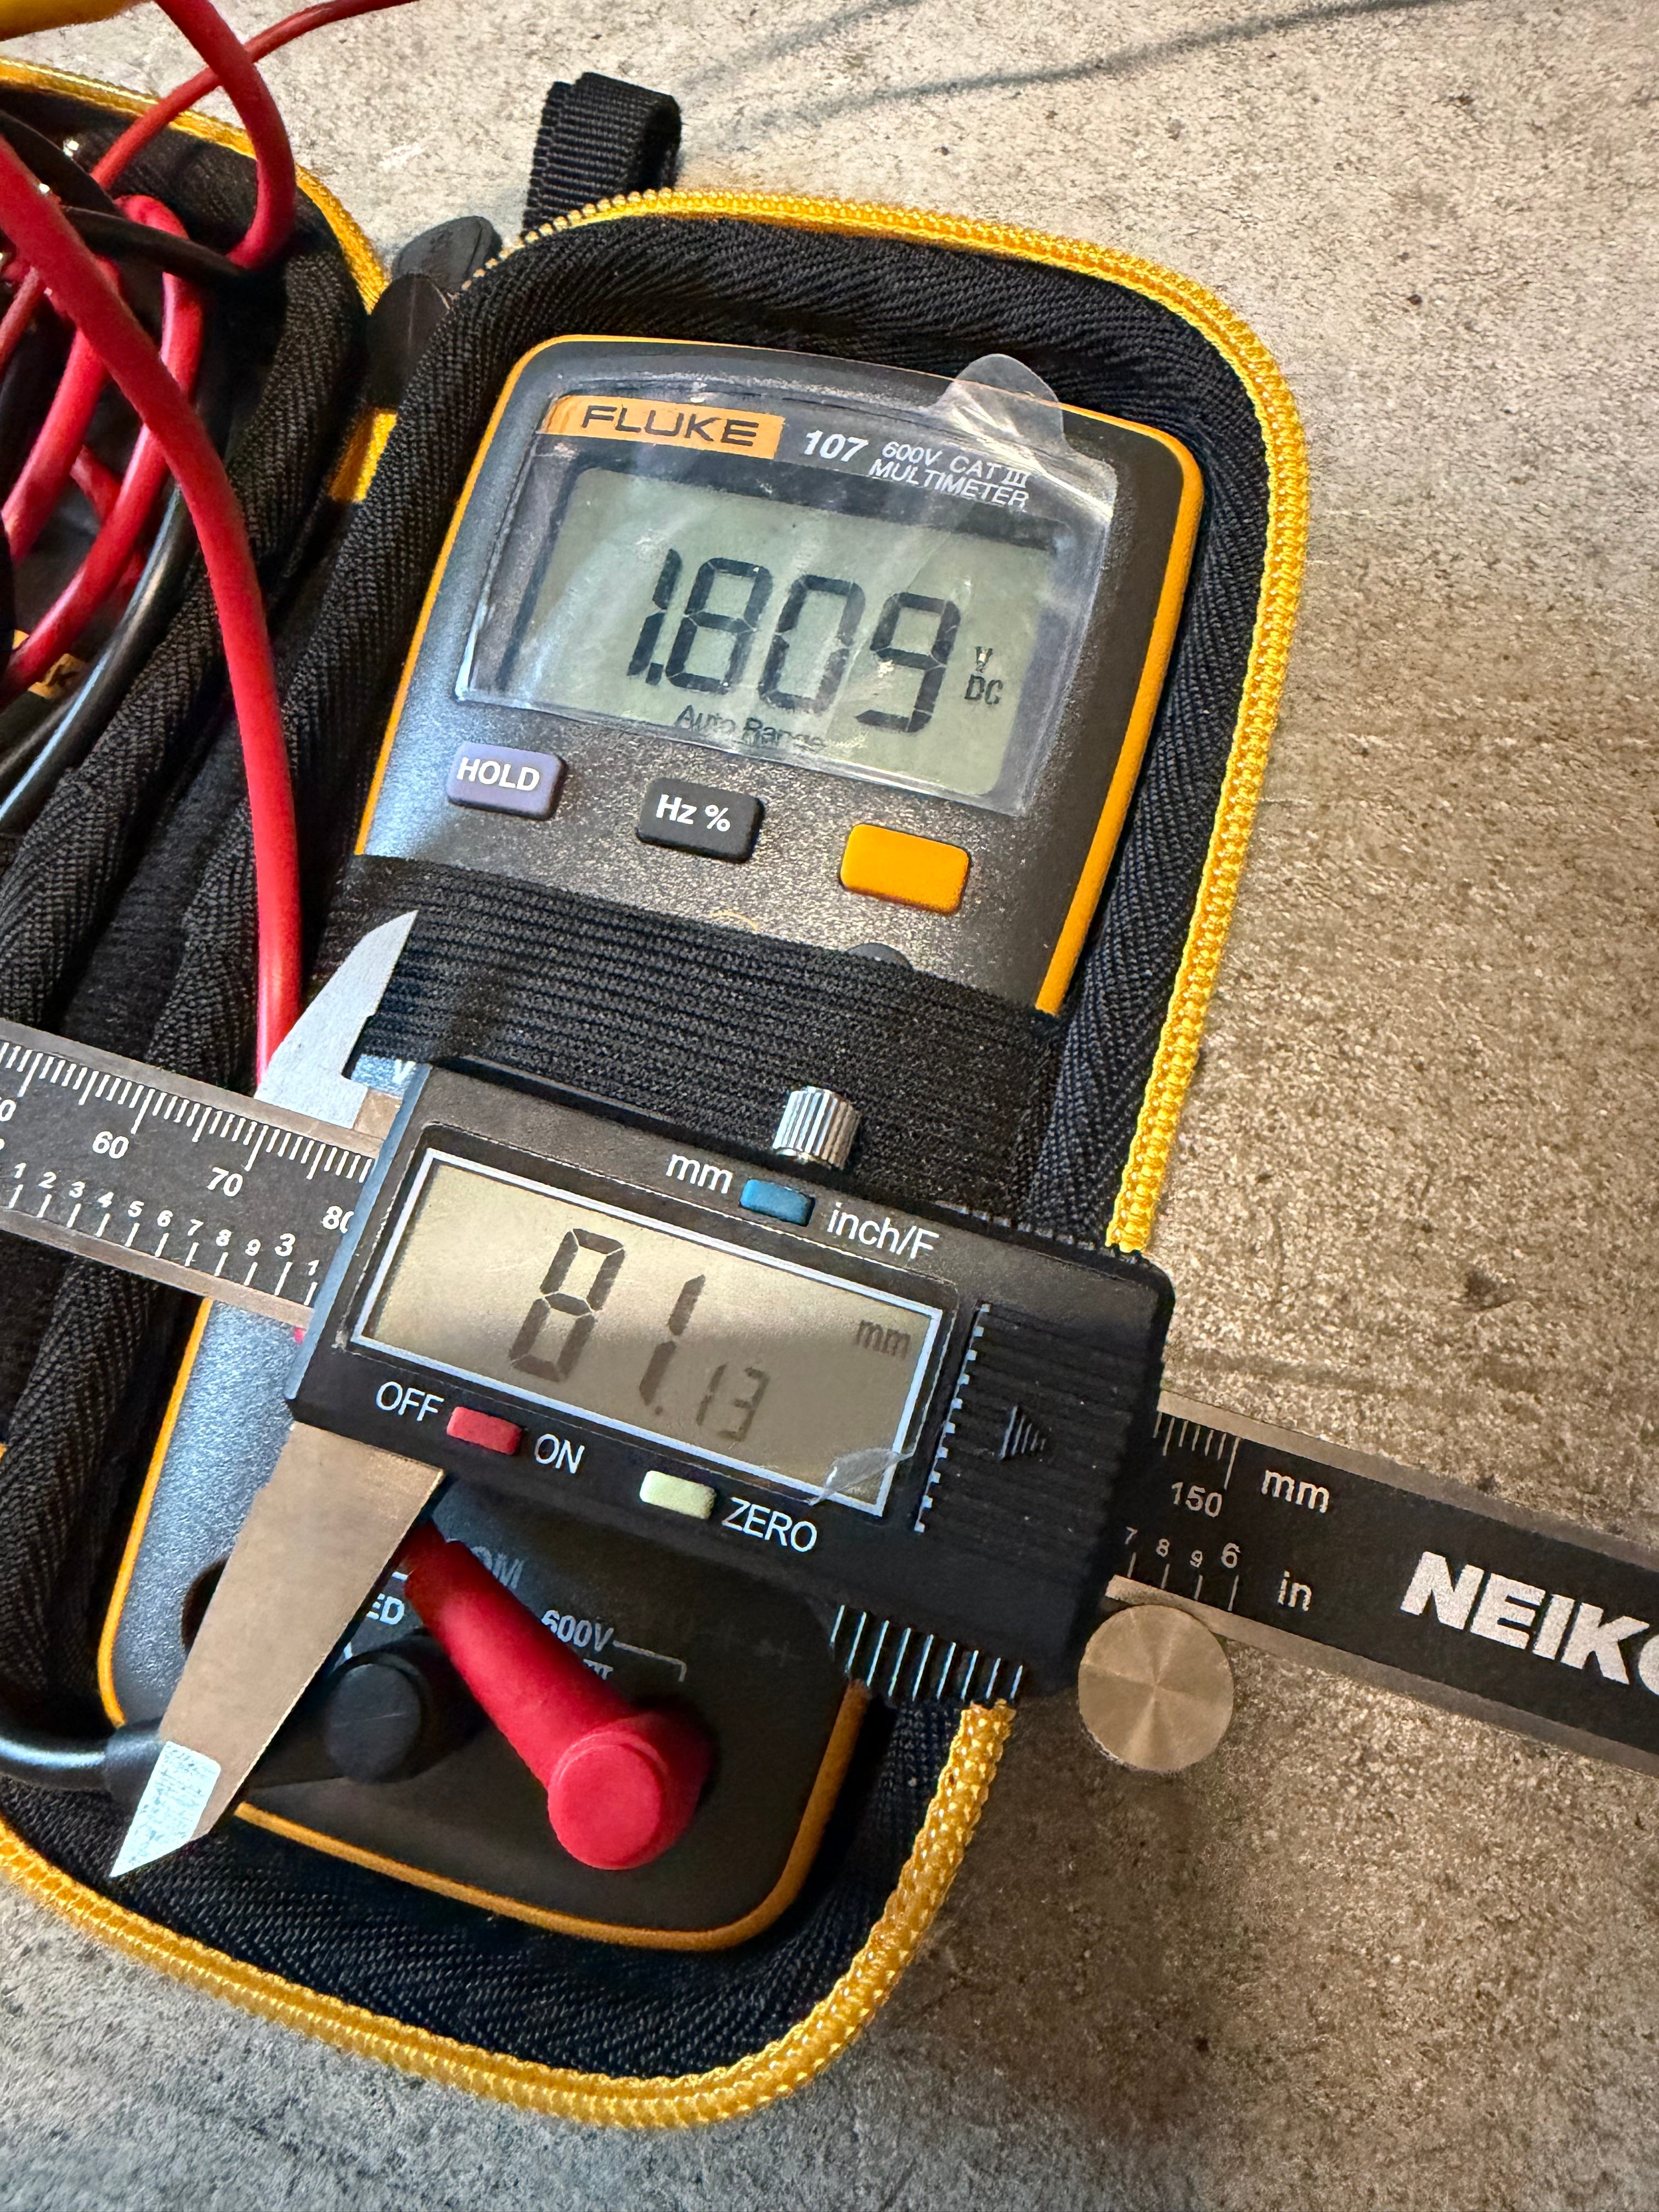
Next I needed to get some mapping of suspension travel to output voltage from the sensor. My intention was to get at least two different travel measurements, as parallel to the rear shock travel as possible. I picked the lower ball cup knuckle to the bottom of the yellow shock adjustment housing. There was a bit of an angle because I couldn’t get the caliper to measure travel perfectly parallel laterally but I’m not a WSBK or national level rider so the degree of precision isn’t super critical at this point and I can try a fabric tape measure later. This is a work in progress and there will be some refinement to come.
I had my makeshift harness connected to my AiM setup (ACC with analog inputs) so that I could power the sensor and get voltage readings from it. Since I was measuring the voltage between ground and the output of the sensor, I didn’t solder the connections yet. I set my multimeter to read volts DC.
The next part was getting physical measurements of travel to voltage. First I measured with the rear suspension fully extended, the bike ‘hanging’ from a Bursig lift (you could put the pegs on jack stands to do the same thing). I wanted the biggest swing possible for my next measurement so I unbolted the bottom shock bolt and had a helper lift the rear wheel (and swingarm) as high as possible and noted the voltage and travel. I did a third measurement by reconnecting the shock and letting the bike sit on the ground under its own weight. This gave me three measurement points which is sufficient to build a reasonably accurate custom sensor within AiM RS3.
To create the custom sensor within RS3, go to the custom sensor tab from the main menu. You’ll go into the details of the type and plug in the measurements. Below you’ll see that I’ve set my measurement type as ‘Position’ and set it for auto-calibration (which will allow me to calibrate it based on the ride height).
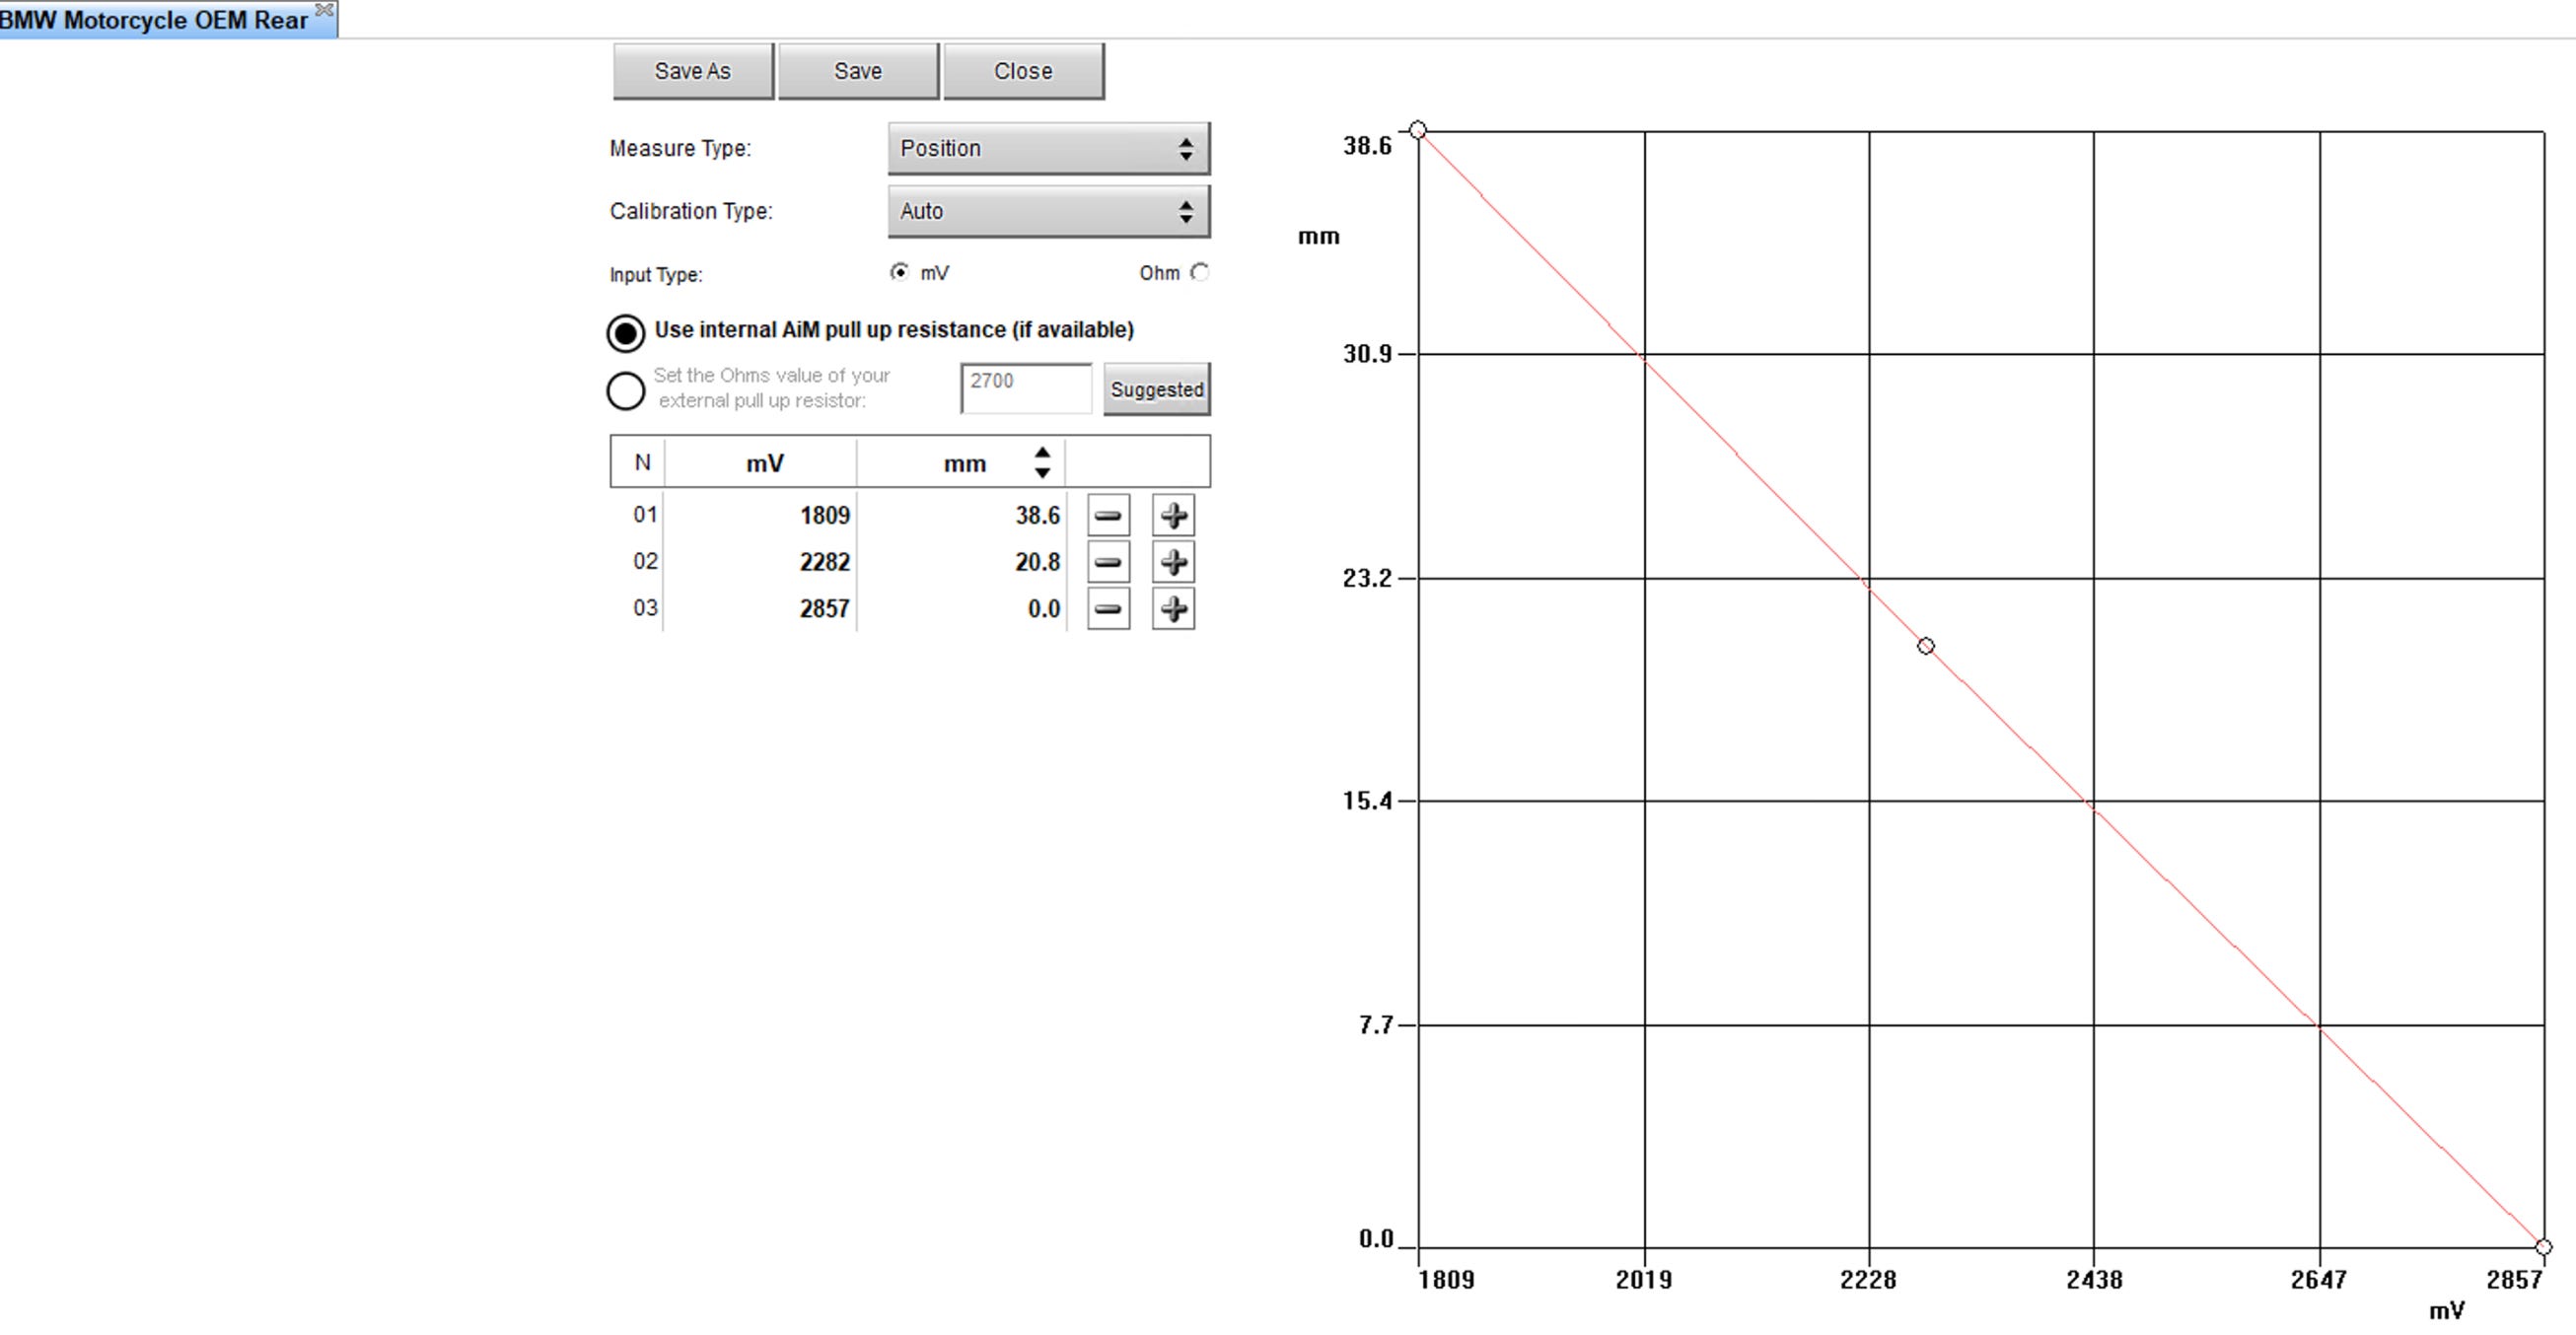
After inputting the above measurements (voltage to distance), I put the heat shrink tubing on the solder joints and zip tied the harness out of the way.
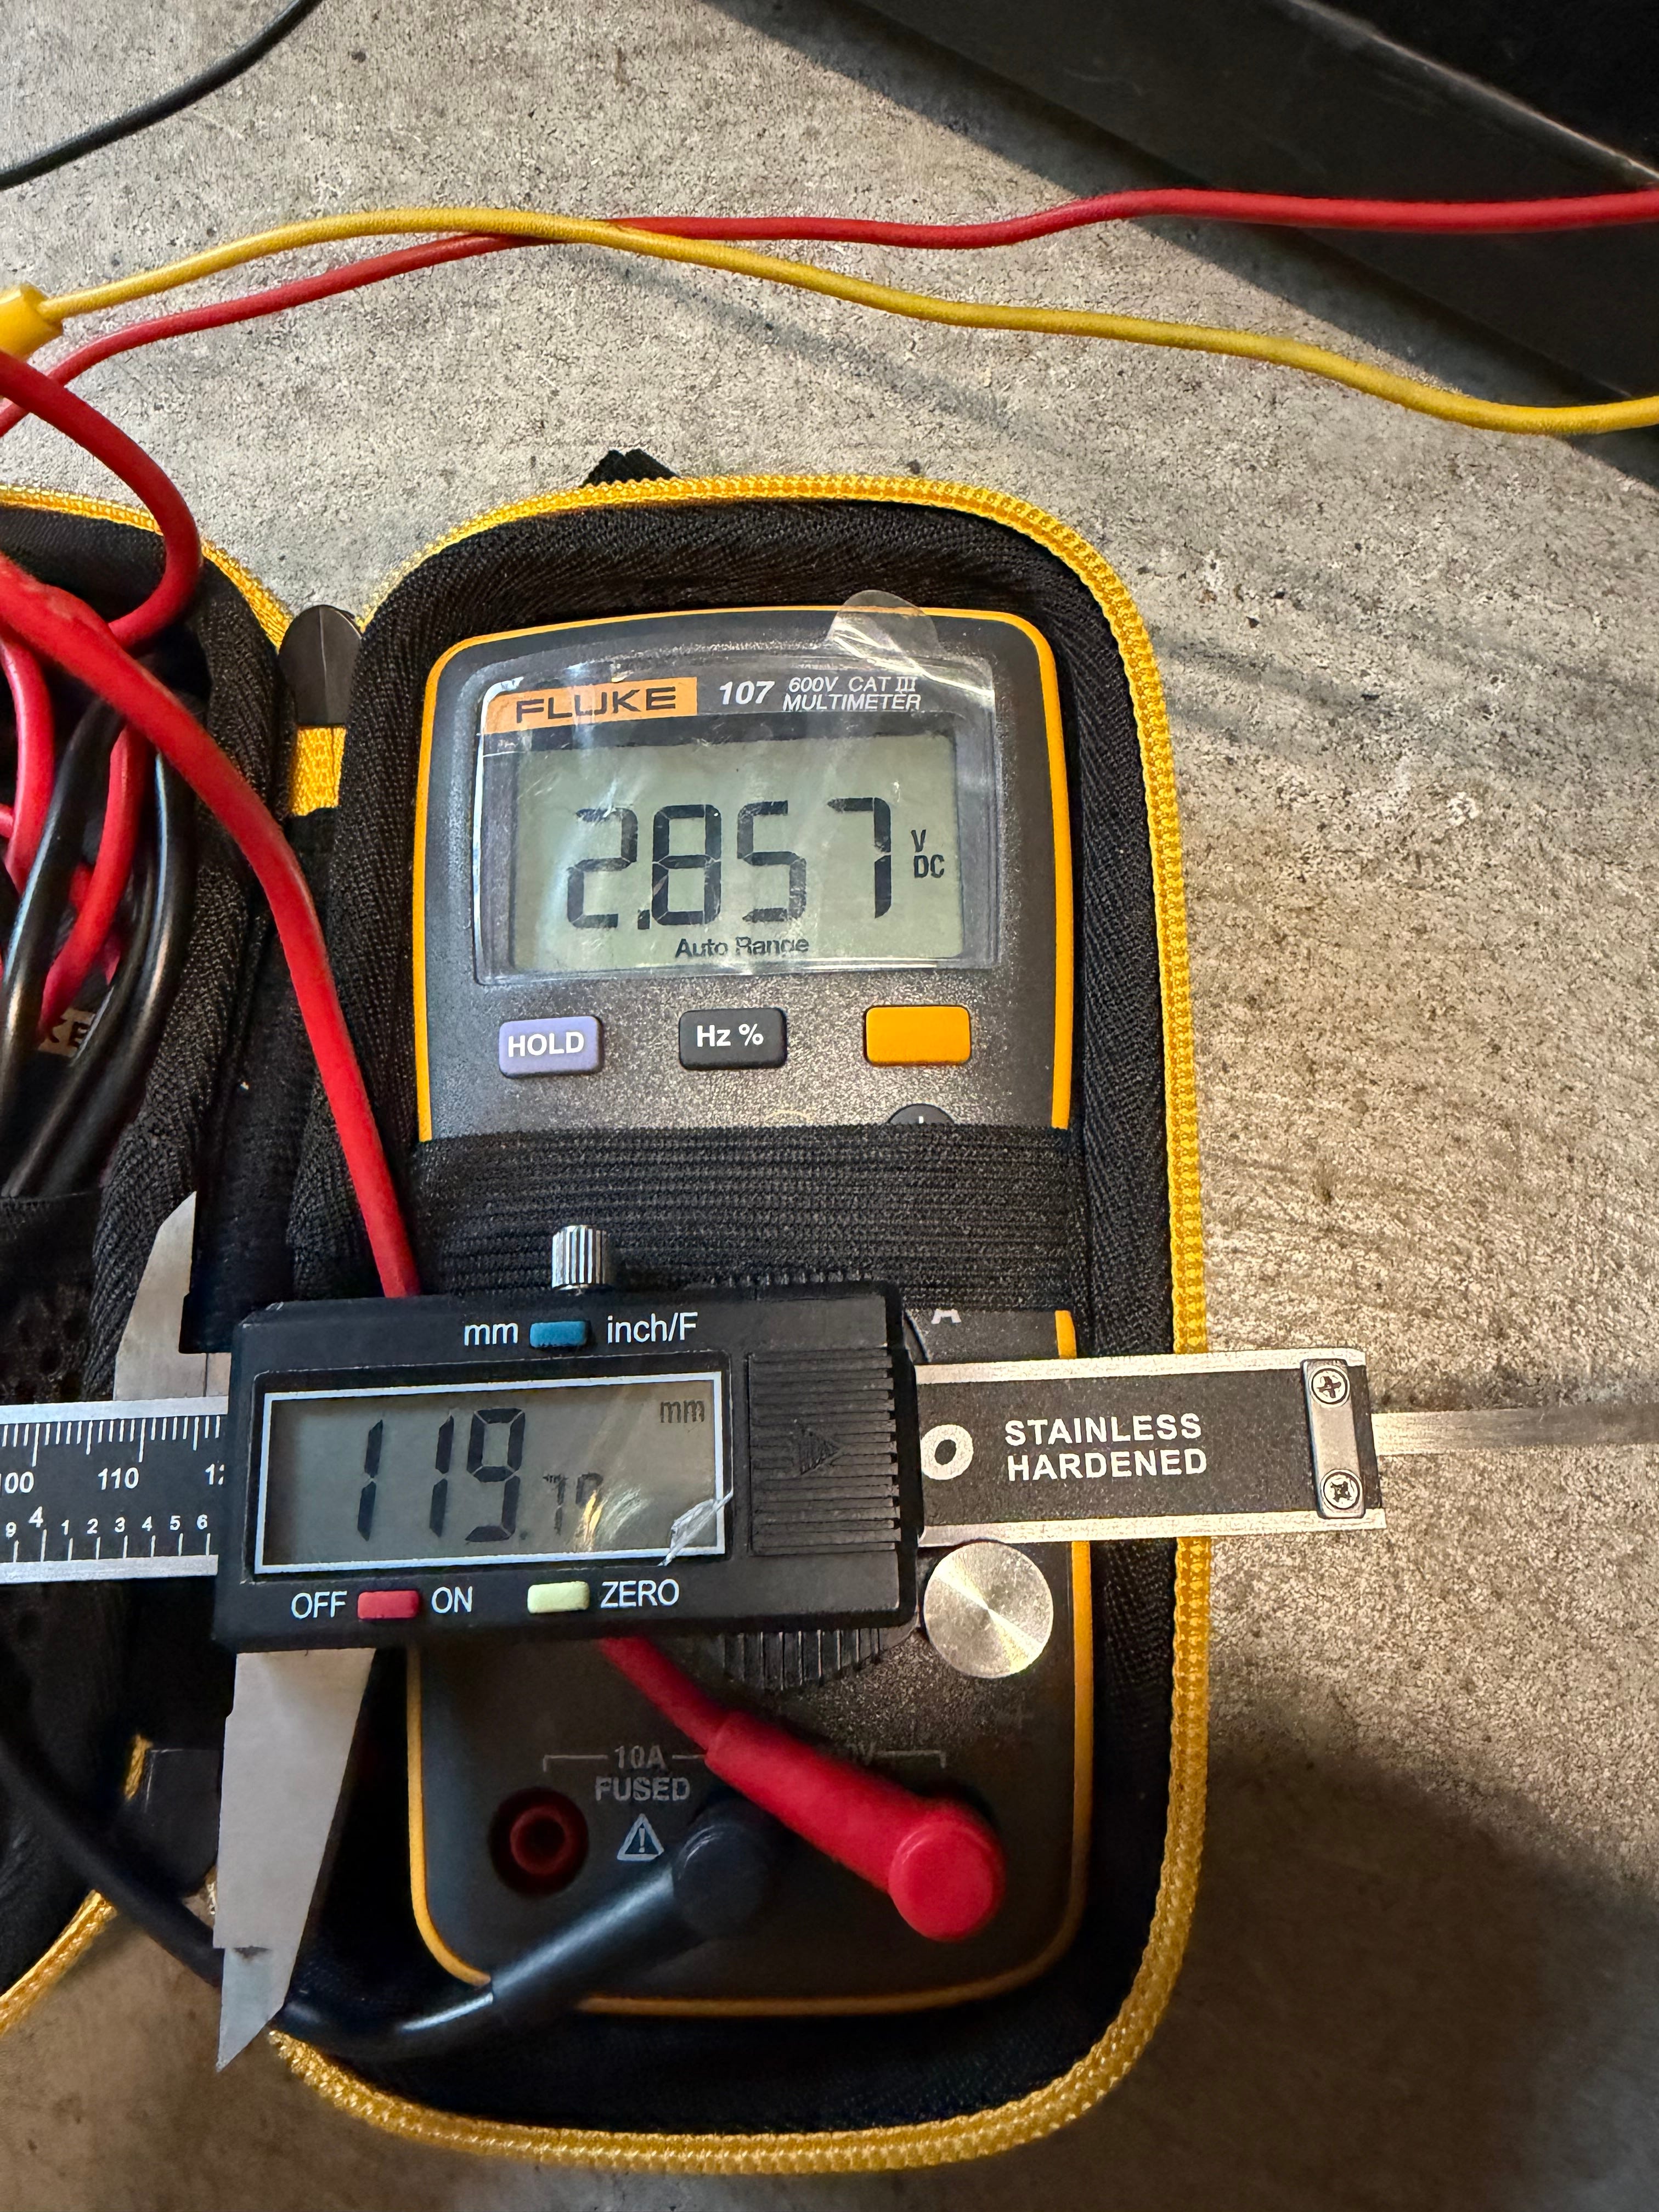
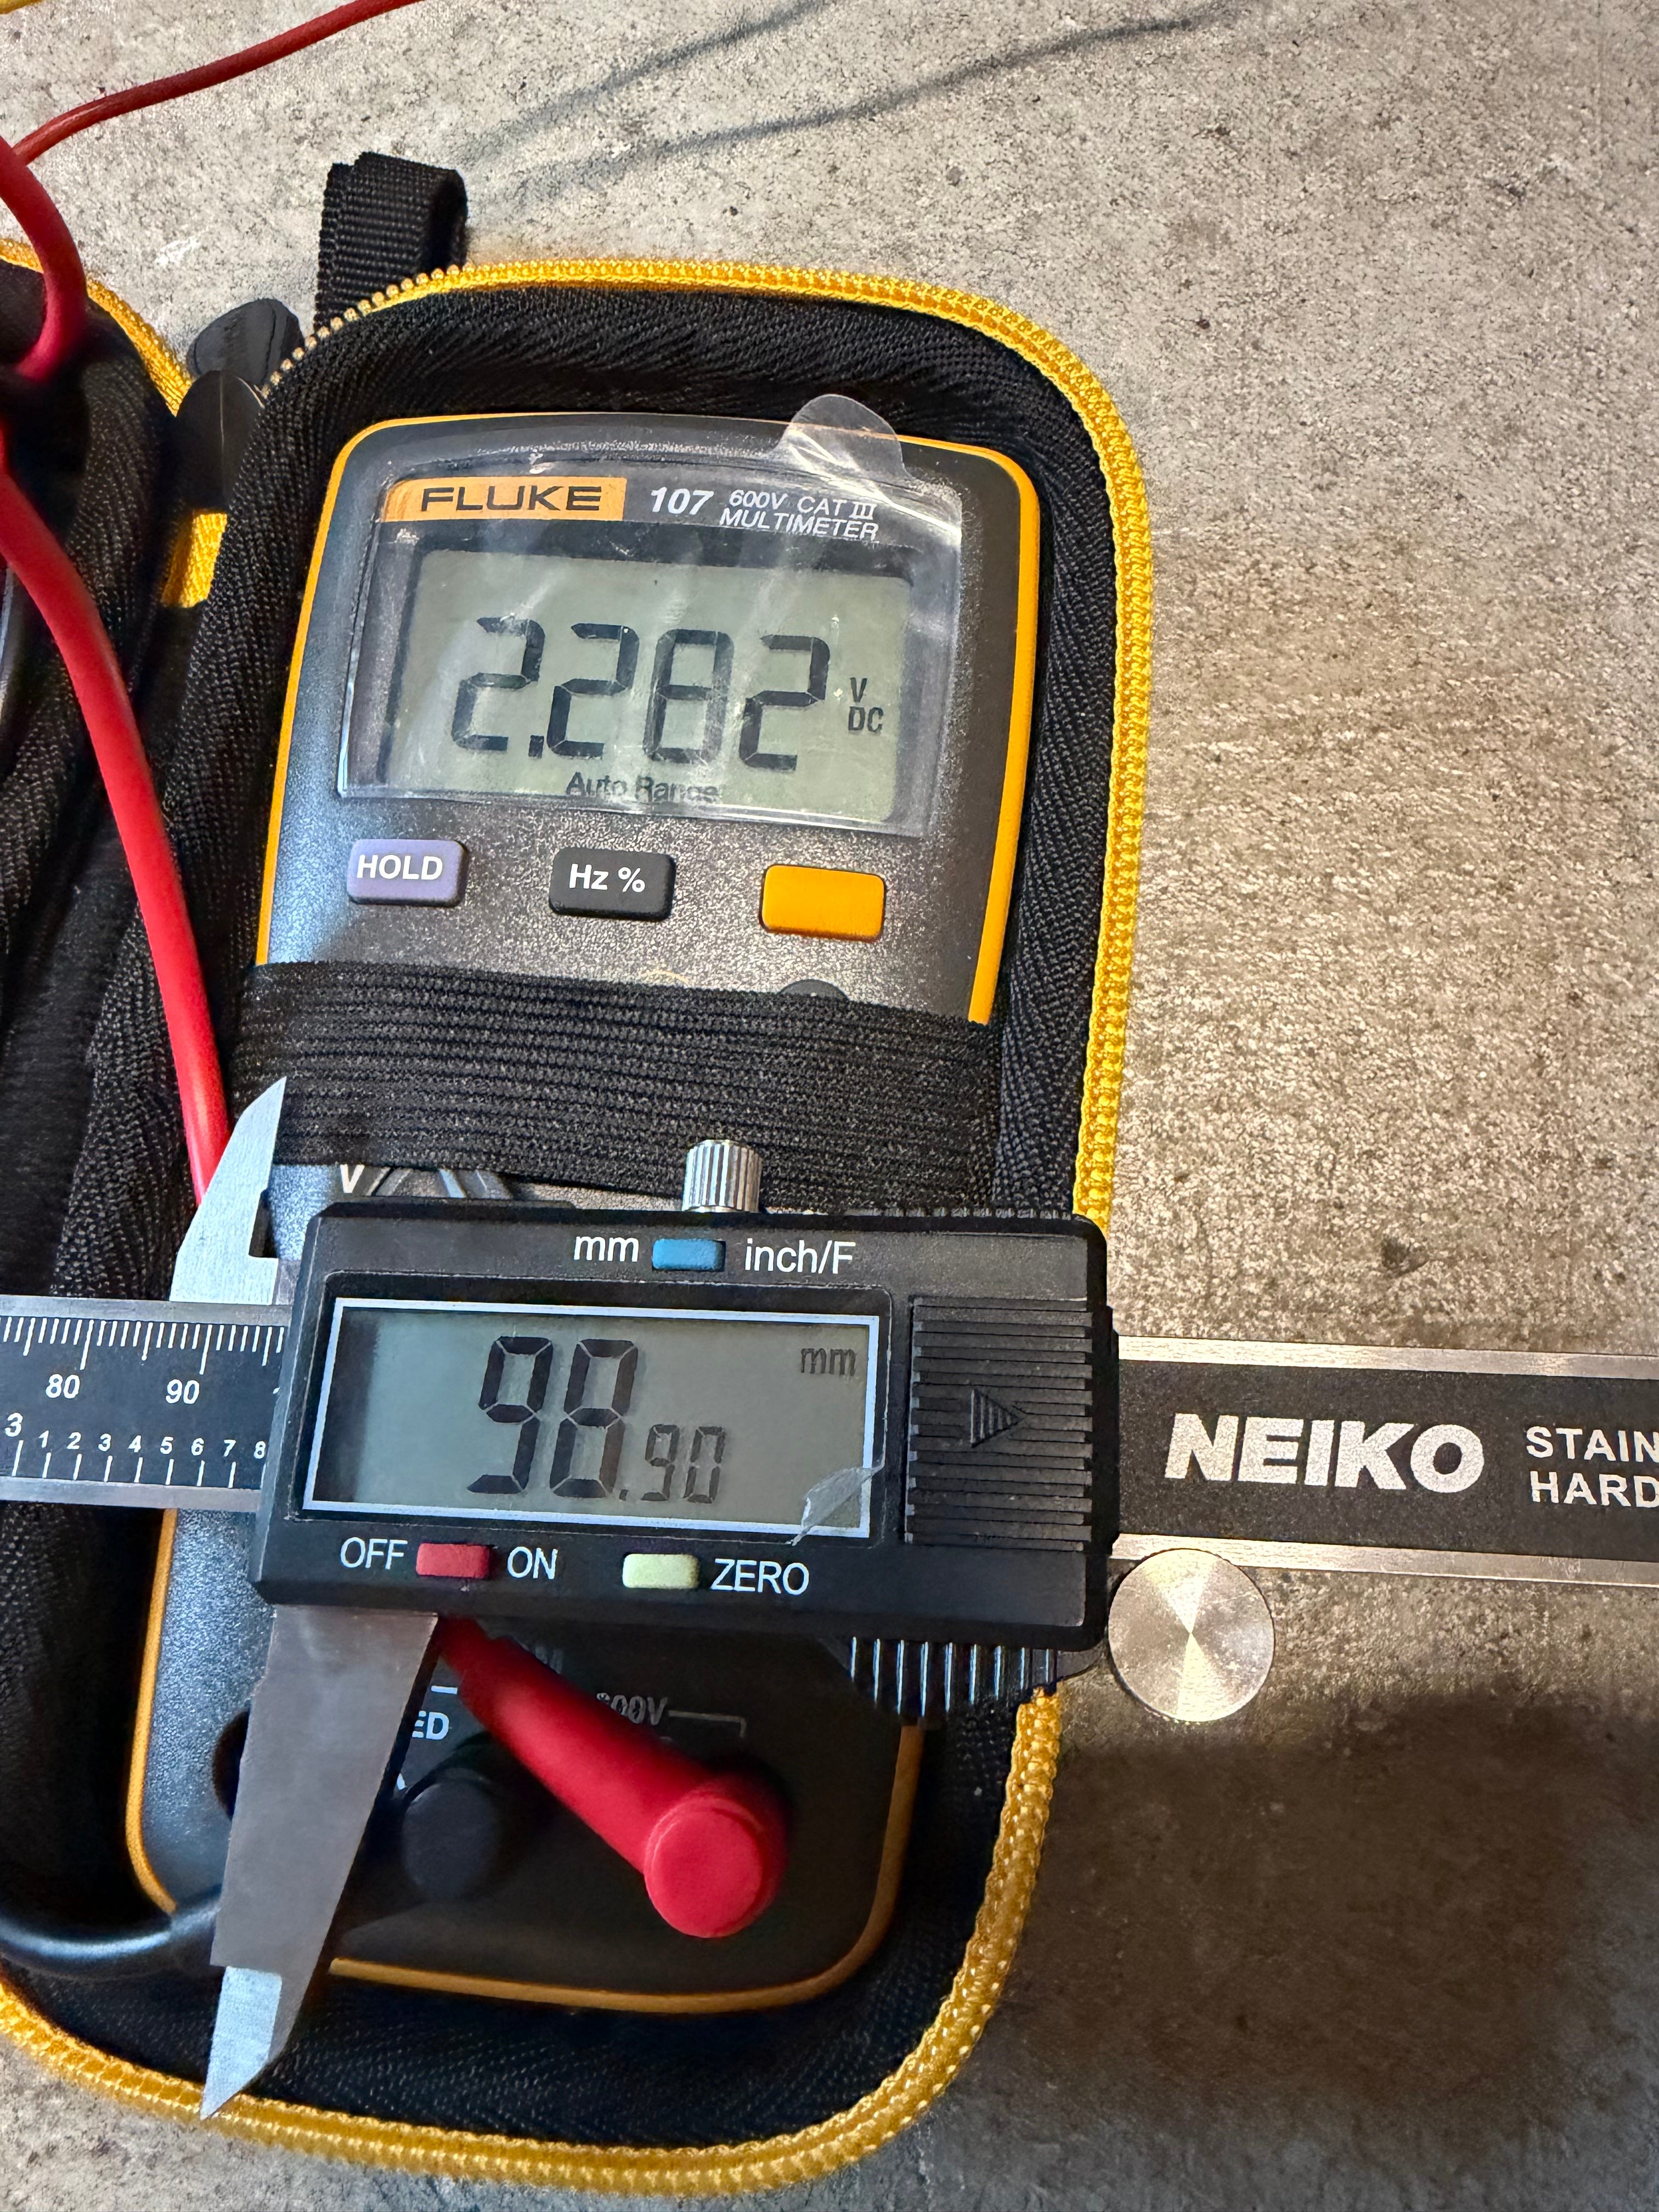
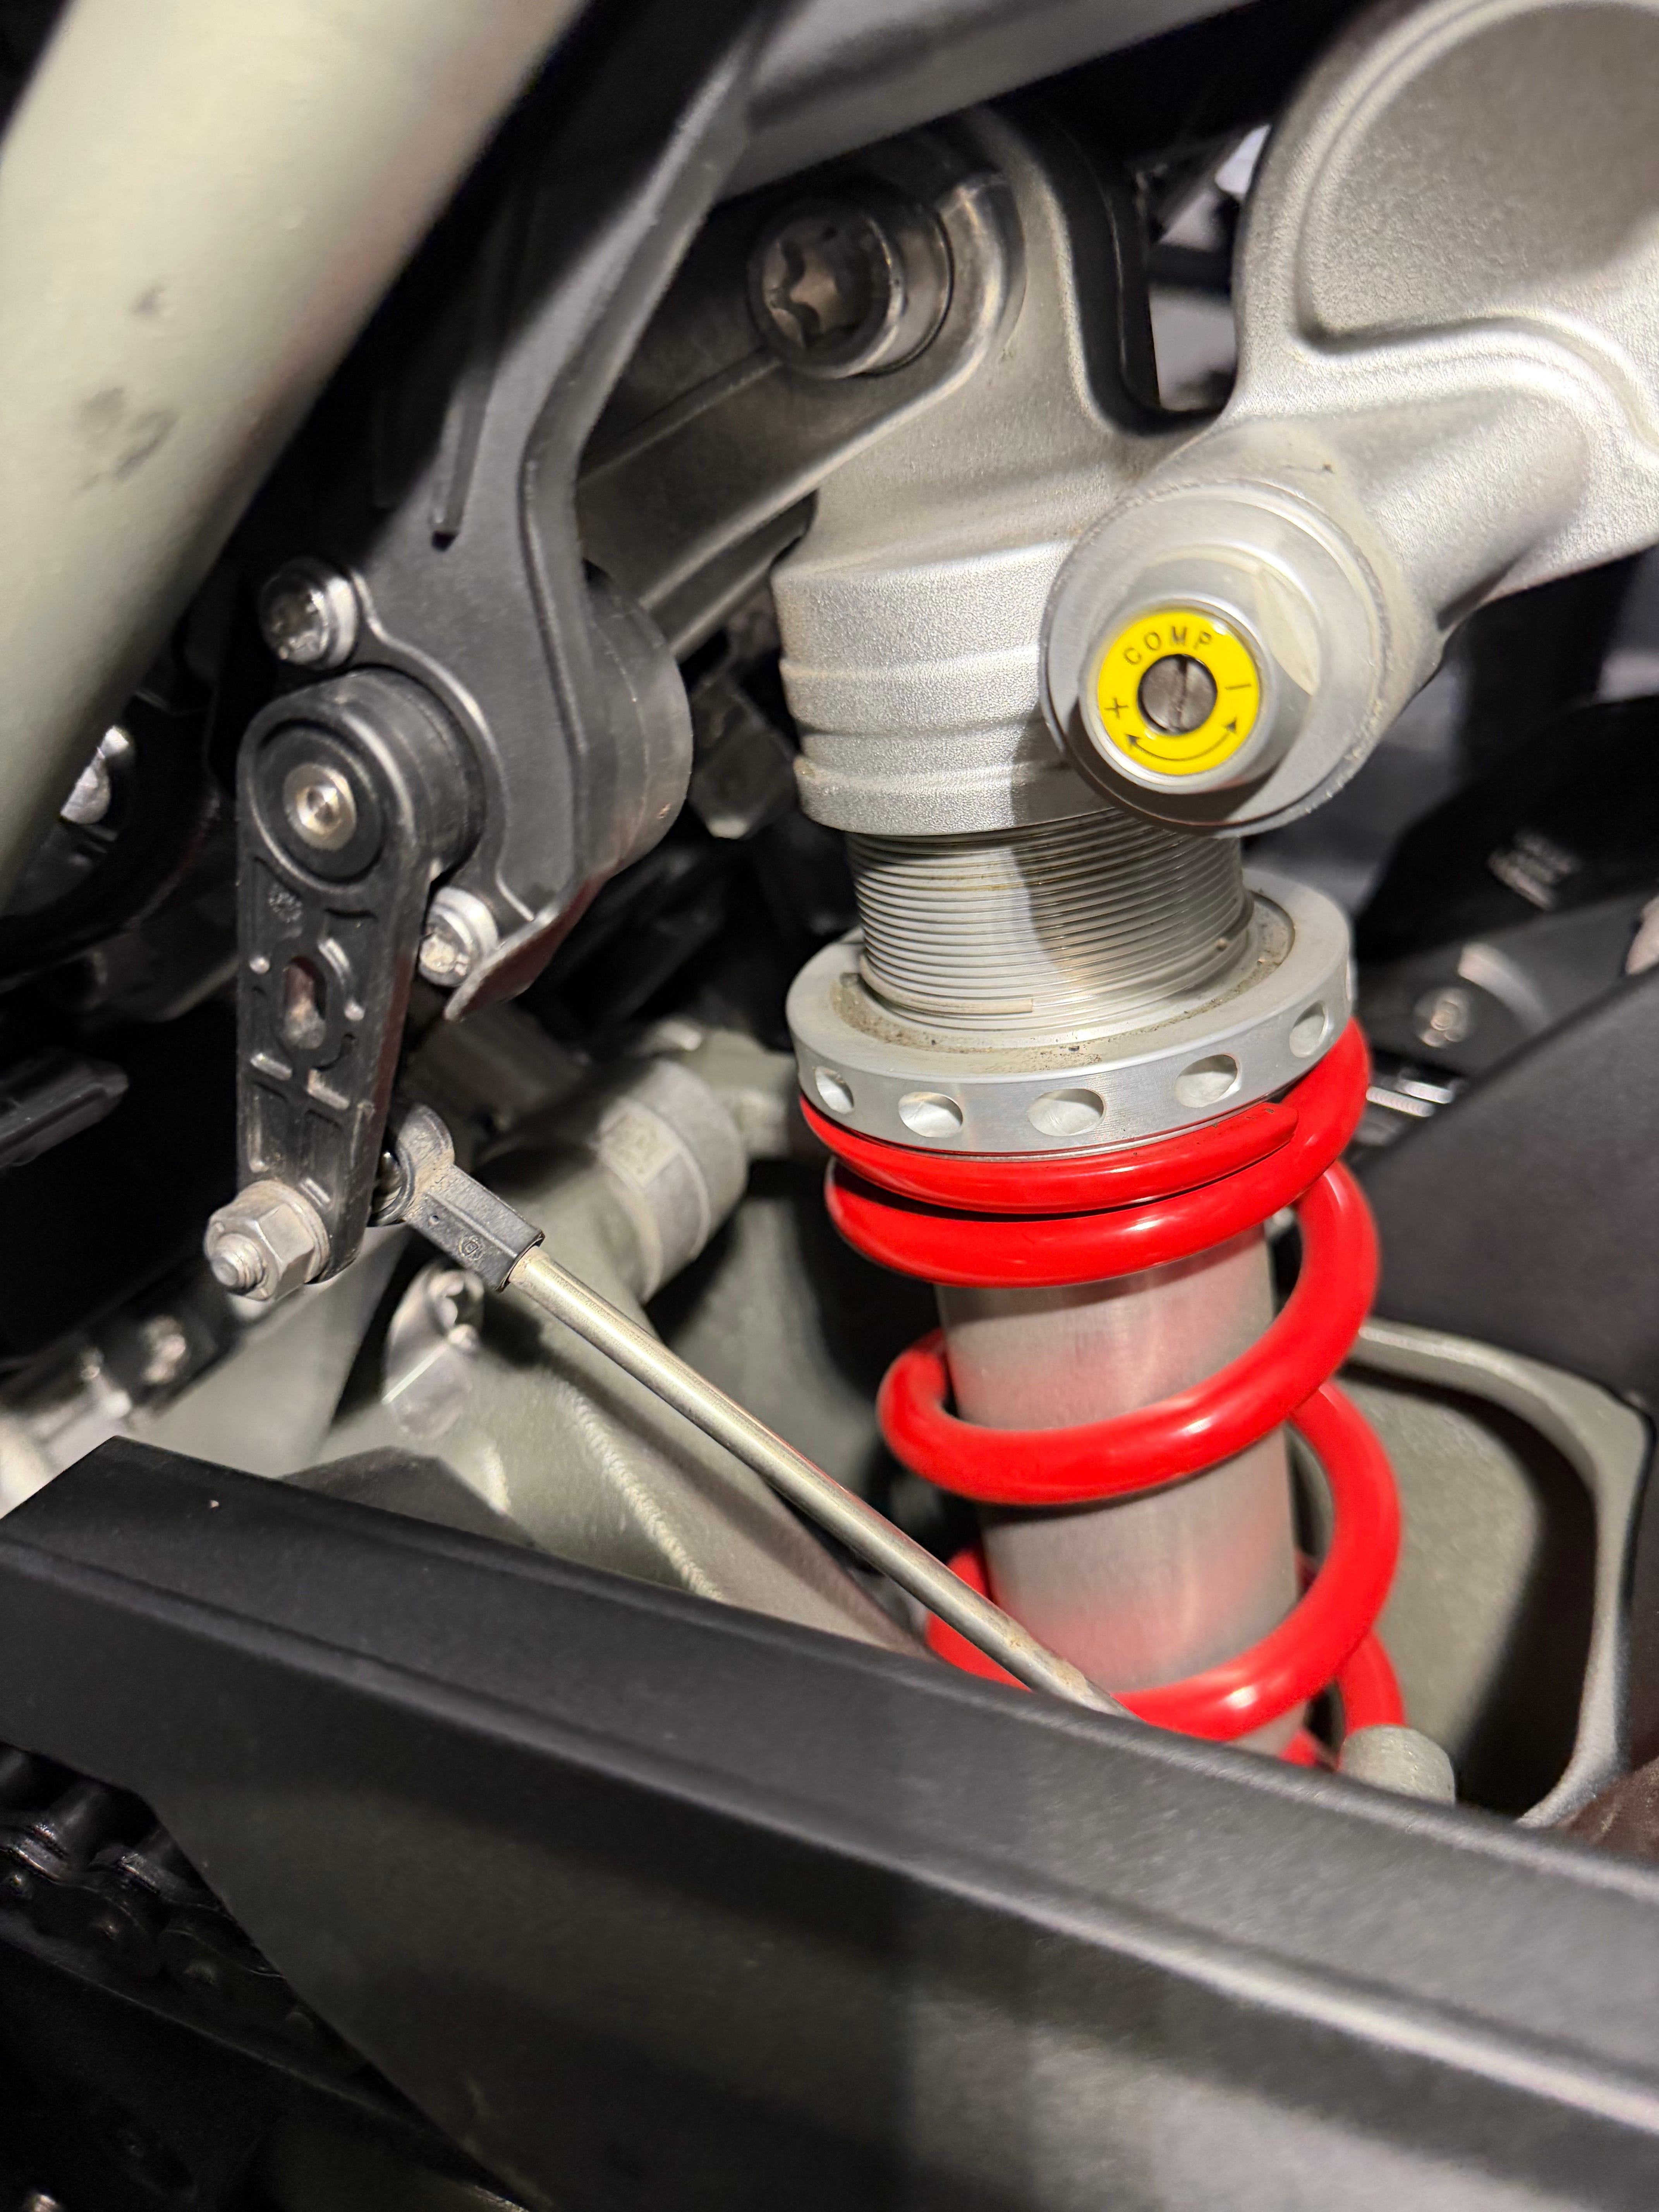
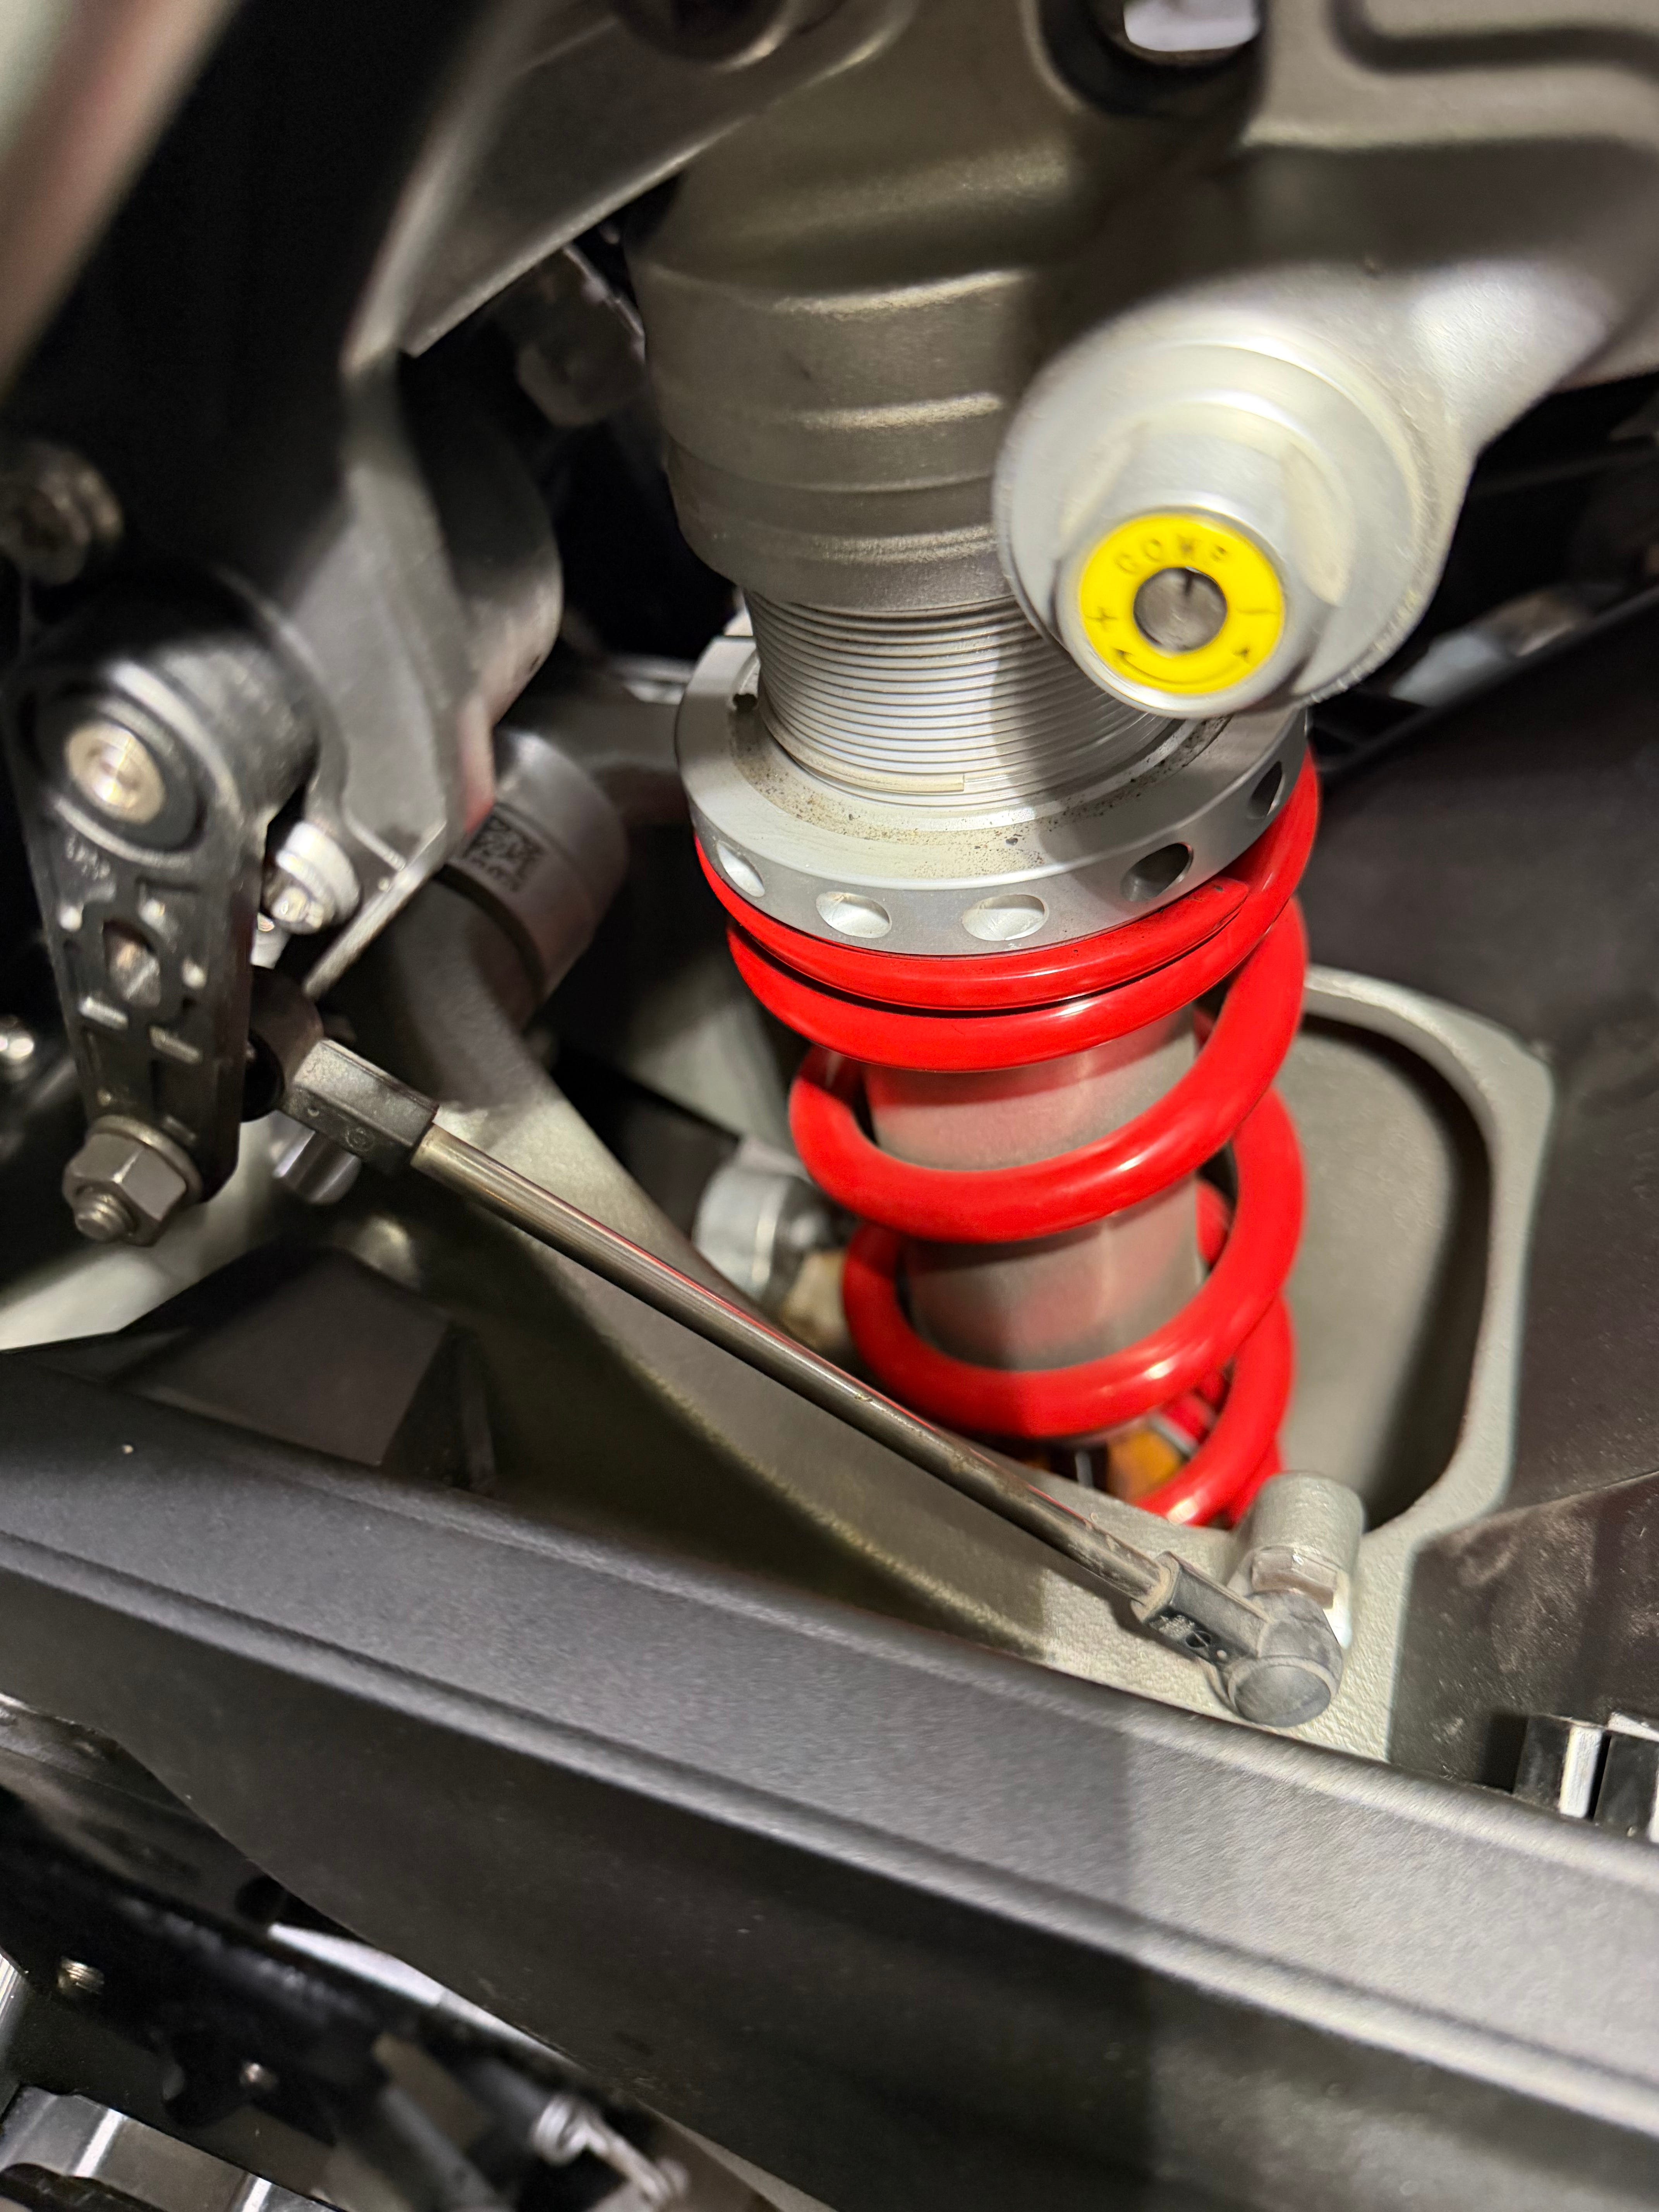
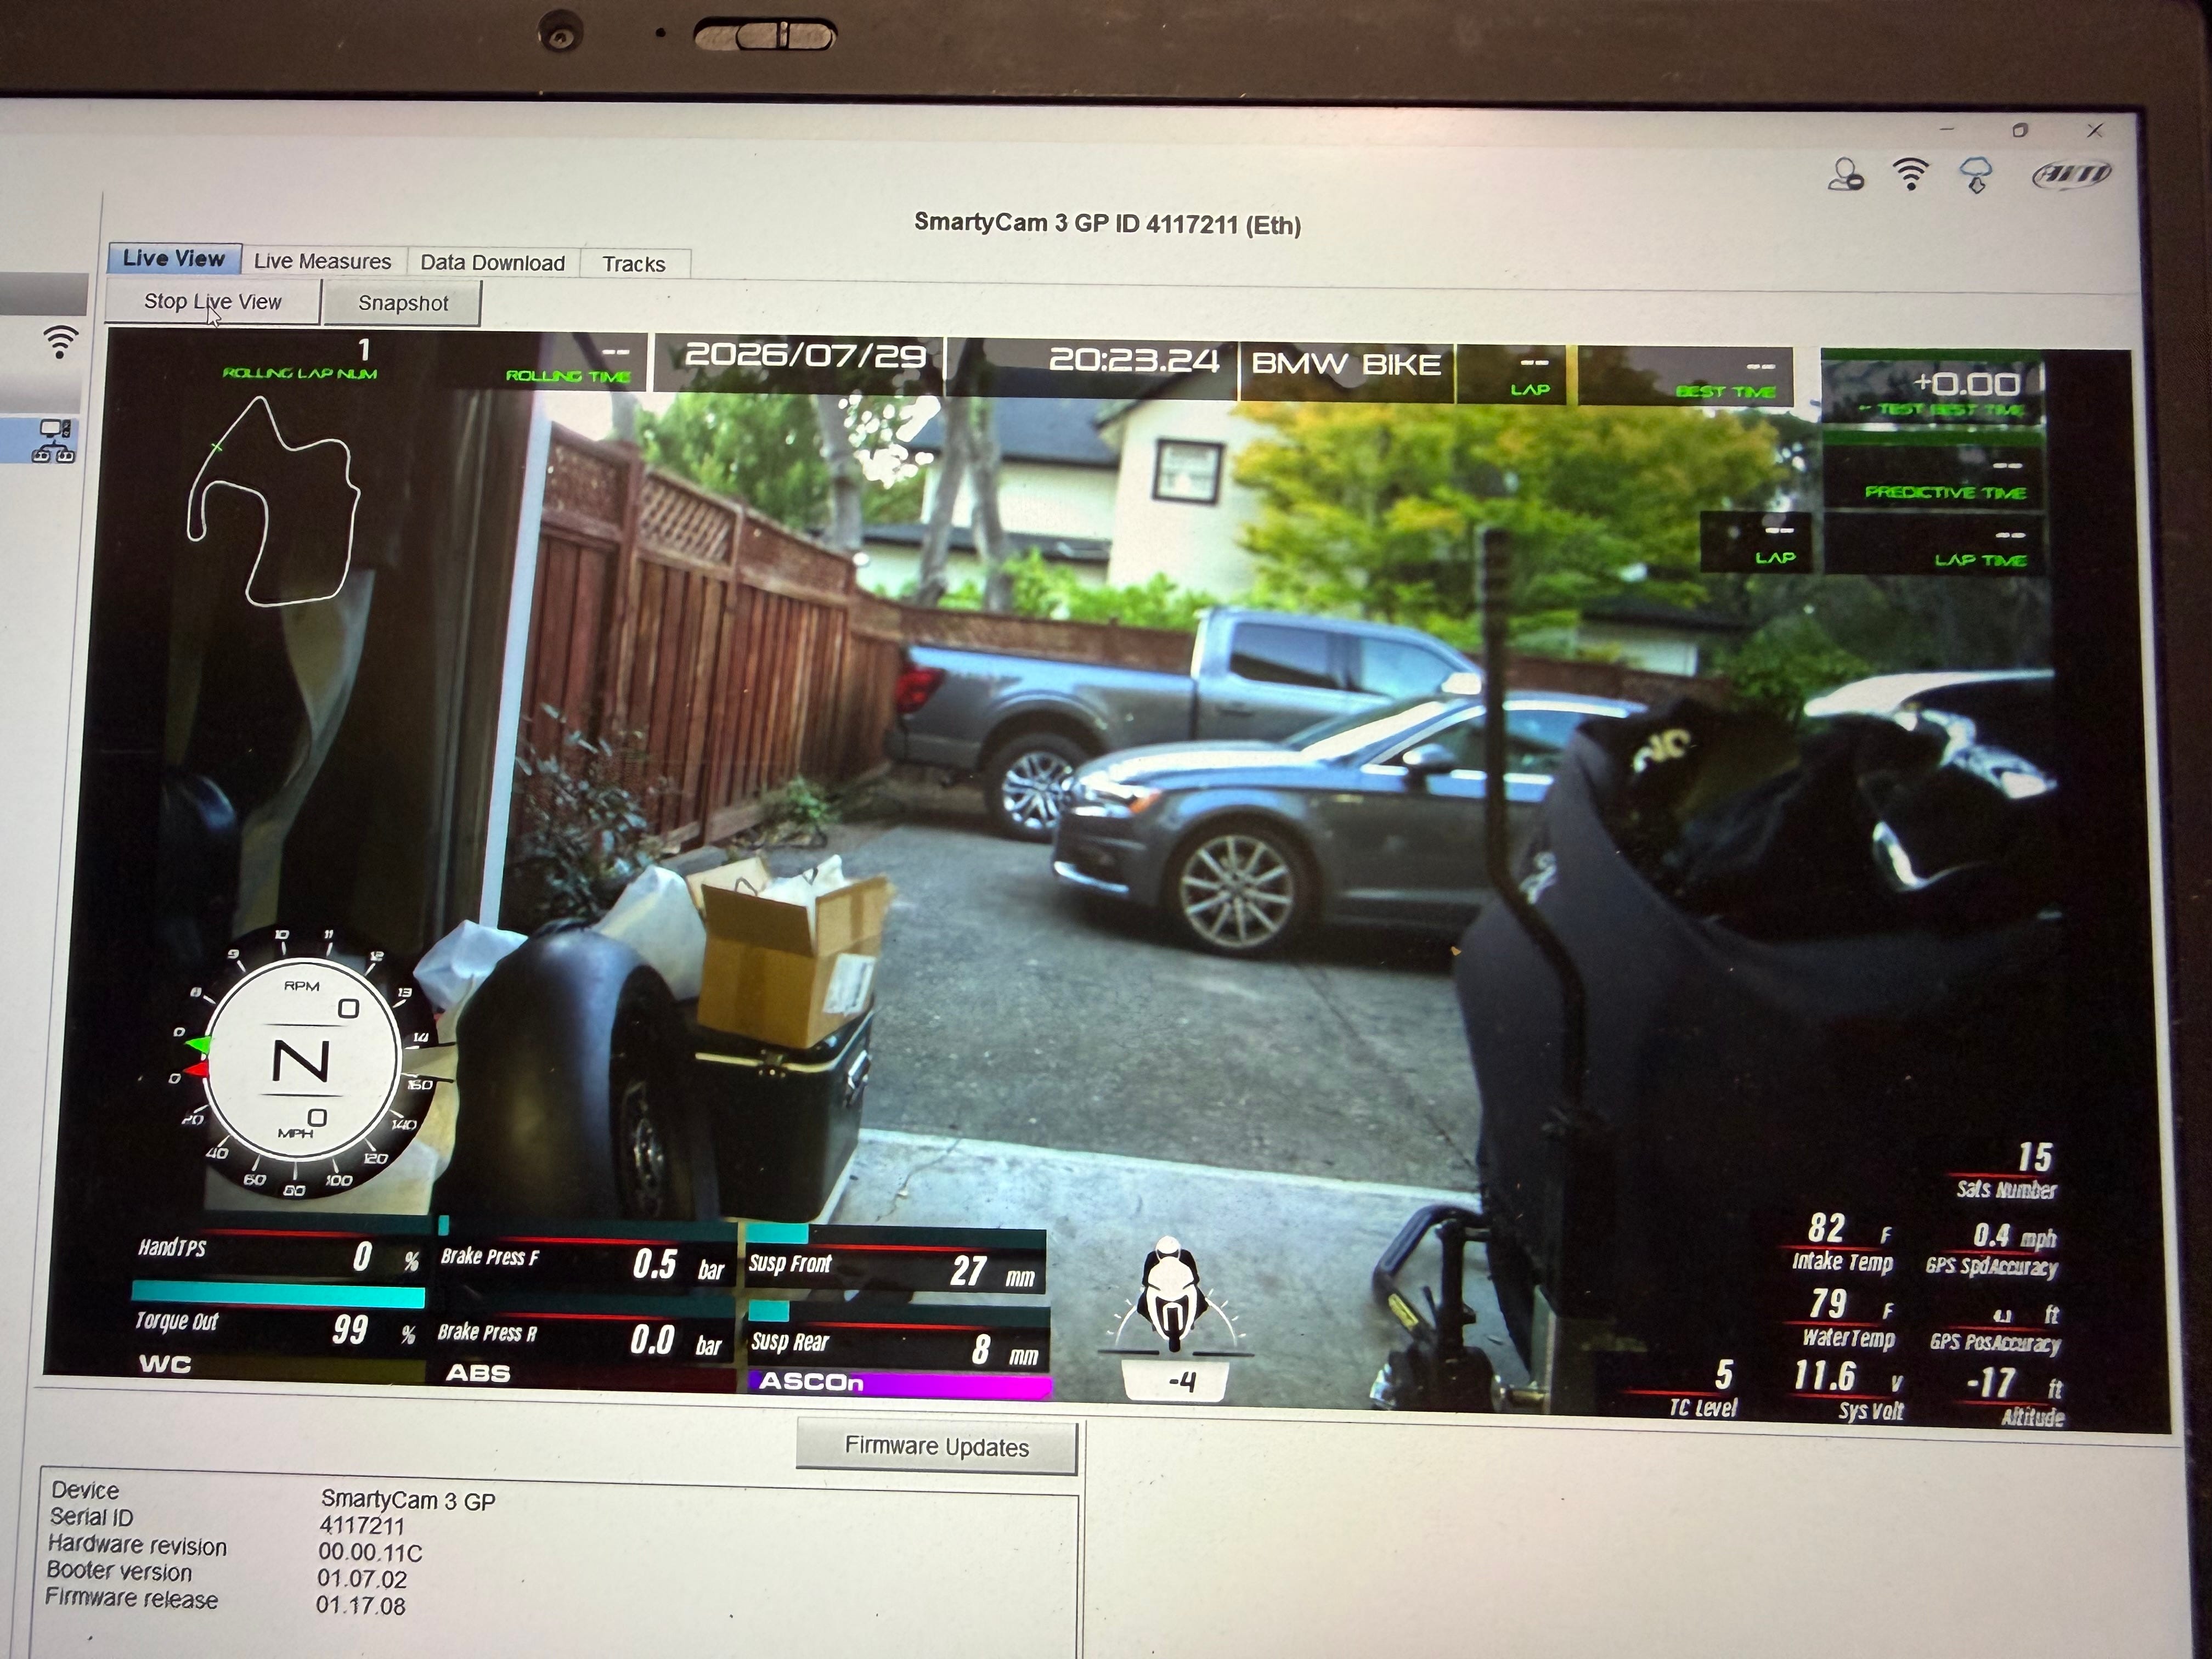
The finished product, once mapped in RS3, gives me usable suspension travel measurements that are accurate enough for an enthusiast and having this sensor on the GS as well as my previous RR, I know that it’s reliable and one nice benefit, compared to an aftermarket parallel suspension pot, is that it’s out of the way and subjected to less road debris so it won’t require the same degree of cleaning as a traditional potentiometer.